AI Virtual Staging Tutorial: Step-by-Step Guide to Transform Empty Rooms
Welcome to this tutorial on AI virtual staging for real estate listings. After working with over 1000 images, I’m excited to share a straightforward guide to help you transform empty rooms into inviting, furnished spaces using AI in Banana Designer. Along the way, we’ll cover costs, alternatives, and best practices to get the most out of your staging efforts.
Introduction
What is AI Virtual Staging in 2025?
AI virtual staging uses advanced image editing AI model to stage properties more affordably and instantly, with higher quality than traditional methods. While virtual staging has existed for years, earlier services ranged from $1-2 per image using AI to $30-40 for manual work.
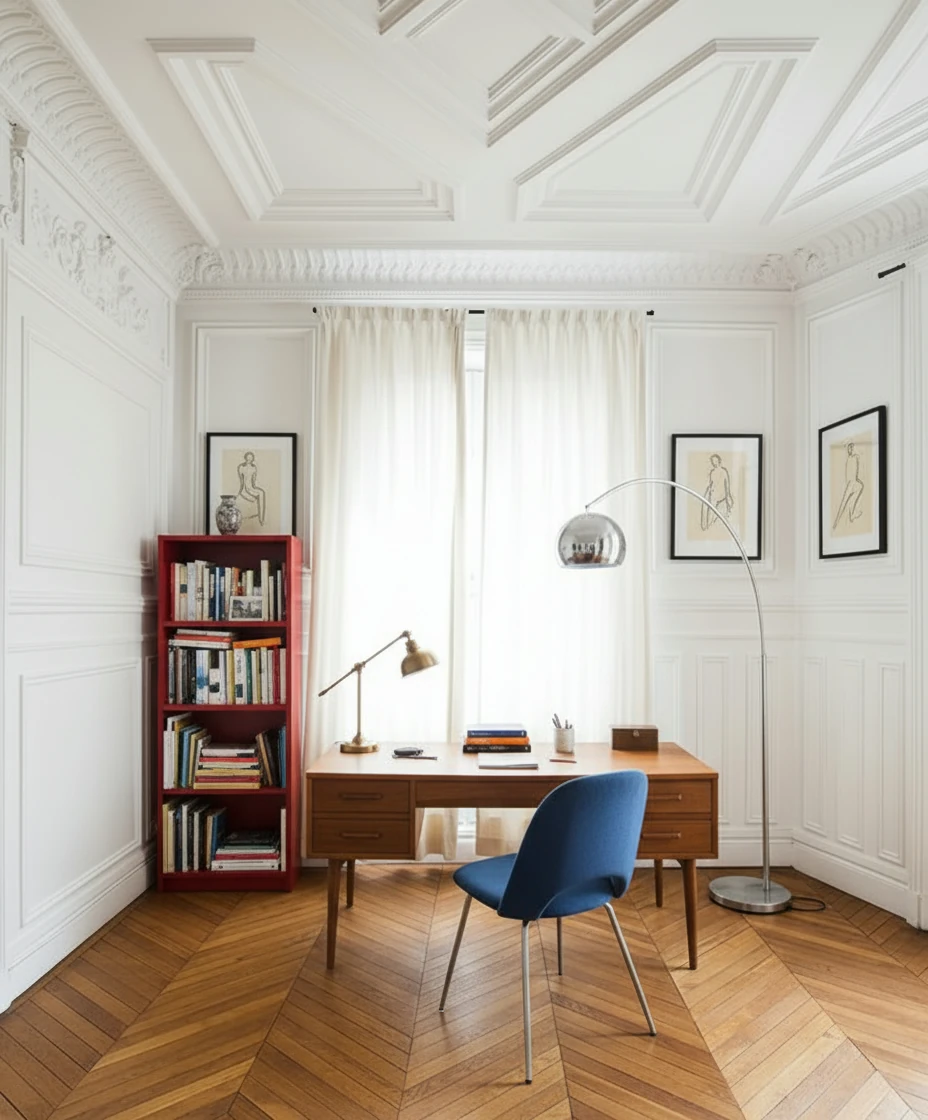
Furnish the study with a mid-century wooden desk centered in front of tall, cream-draped windows, paired with a blue-upholstered chair featuring metal legs. Place a vintage desk lamp and neatly arranged books and stationery on the desk. To the left, add a red open bookshelf filled with books and decorative objects. Include a tall arched chrome floor lamp curving over the desk for dramatic lighting. Hang two framed figure drawings symmetrically on either side of the window. Keep the ornate white paneled walls and chevron wood floor exposed for a refined Parisian atmosphere.
The release of the Nano Banana image editing model in 2025 changed the game—now you can achieve professional results quickly and at a fraction of the cost, without needing to master complex editing software.
Why Staging Is Hard
High-quality photos with the right furniture are crucial in real estate, but balancing quality, speed, and cost has always been a challenge. Typically, you had to choose between good quality and speed at a high price or fast and cheap but low quality. This trade-off complicated the process and made it harder for realtors to offer top service and close deals quickly.
Why Does AI Virtual Staging Deserve Any Tutorial?
AI virtual staging is easy once you understand the basics and a few advanced tips. Without this knowledge, you might struggle to create great staged images and waste time or money.
This tutorial aims to help you avoid common pitfalls and save hundreds, if not thousands, of dollars.
Why Is AI Virtual Staging in 2025 Different From it in 2024?
Nano Banana. That is the short answer. A new model that can perform precise editing on timage with simple natural language input.

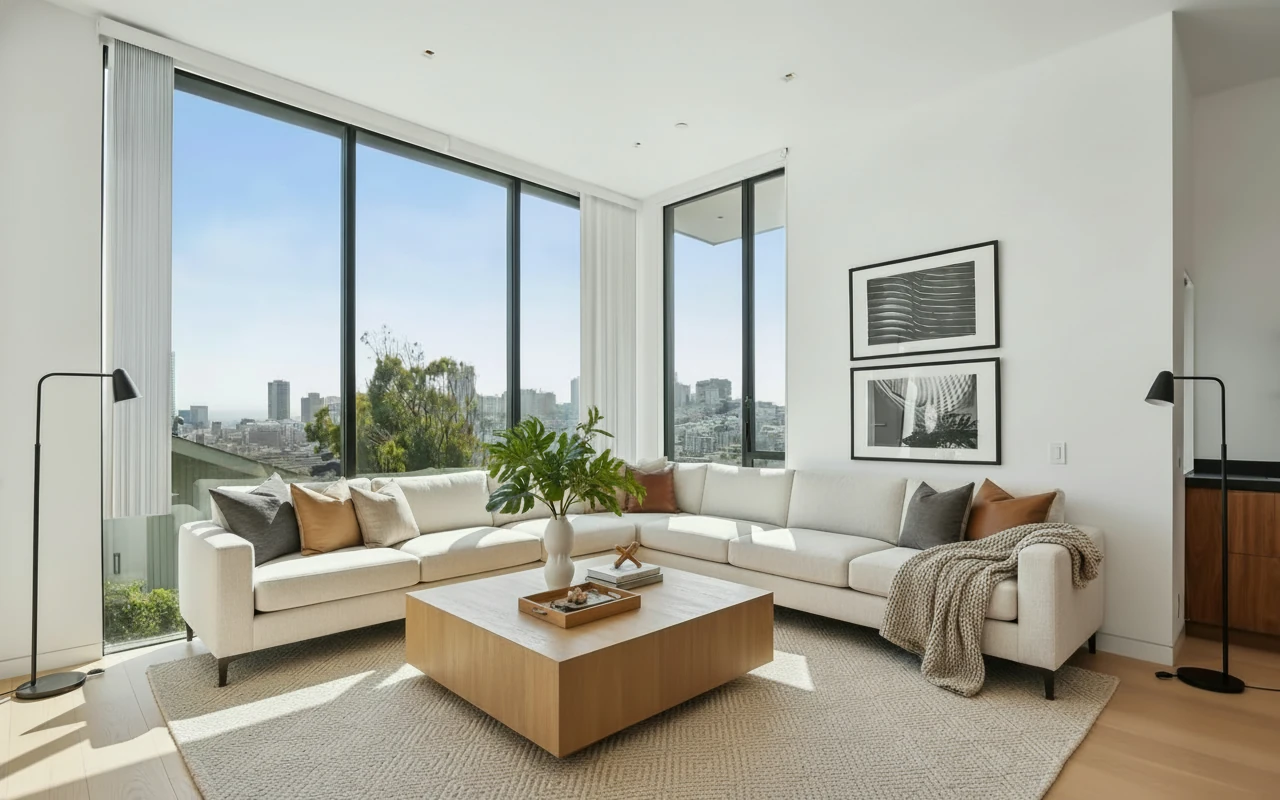
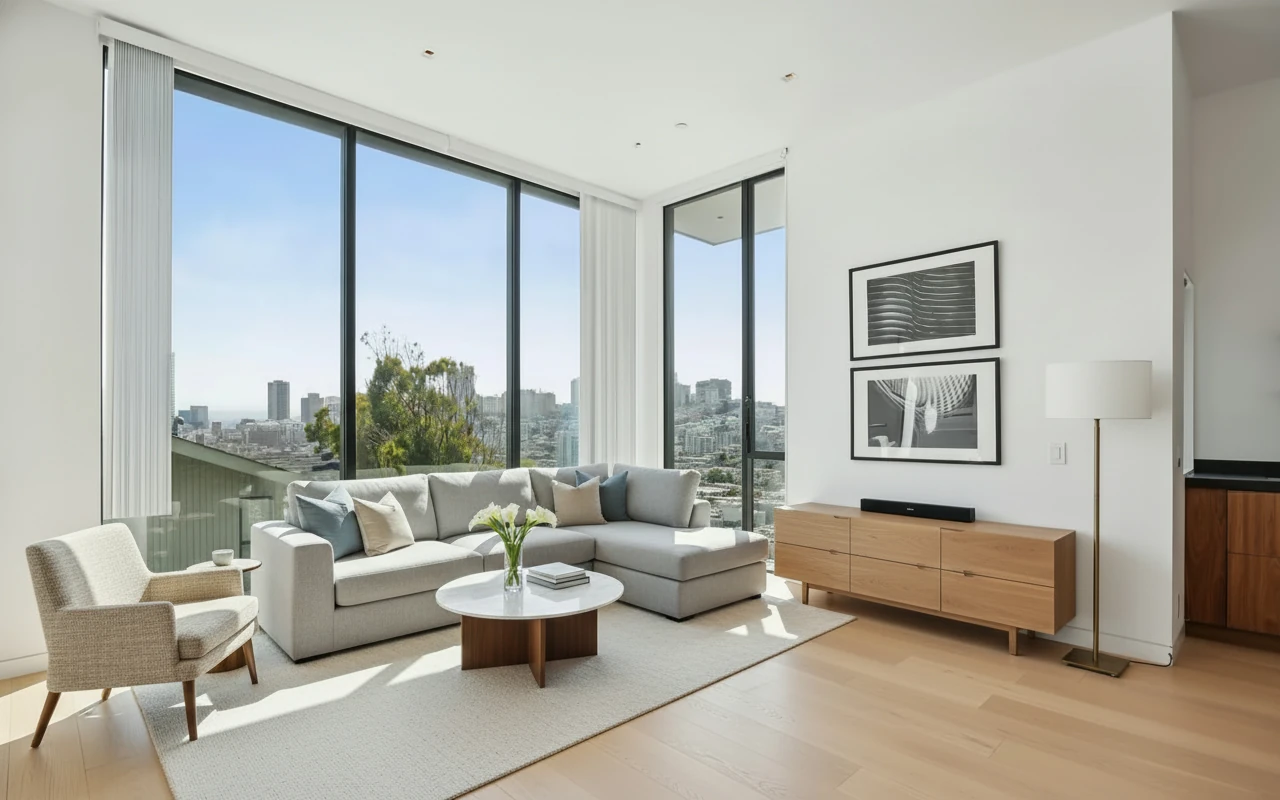
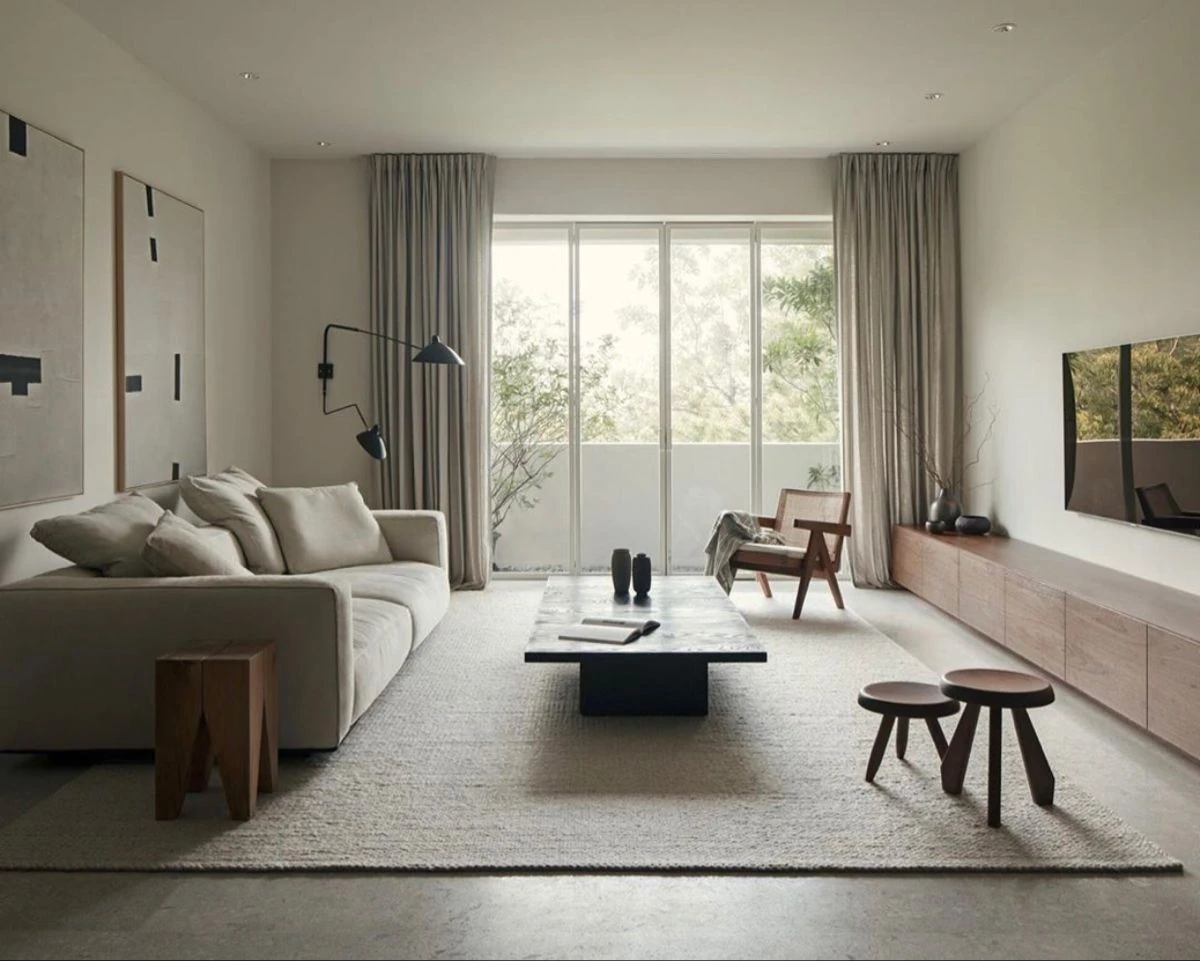
Furnish the room by having the living room arranged around a large square wooden coffee table centered on a light woven rug. Two cream-colored sectional sofas form an L-shape along the left and back walls, facing inward toward the table. Each sofa is accessorized with neutral-toned throw pillows in beige, brown, and gray, plus a folded blanket draped on the right armrest. On the coffee table, a tall white vase with green foliage serves as the focal point, accompanied by small decor objects and a tray. Two round beige ottomans are positioned in front of the table for additional seating. A black floor lamp stands beside each sofa—one on the left by the window, another on the right near the wall with framed black-and-white art. The overall layout creates a balanced, intimate conversation area centered around the coffee table.
You can view Nano Banana's release as the GPT-4 moment for image editing, and all of its abilities are helping to improve the result and cost of virtual staging with AI.
Getting Started with AI Virtual Staging in Banana Designer
The regular process of virtual staging with AI is very simple:
You pick a photo of your room, drag it onto Banana Designer's prompt composer, type your request, and click generate. It usually just works out of the box, and it might not need a full article to explain how it works.
However, this tutorial focuses on two things, as these are the most common pitfalls realtors might encounter when they actually try to integrate the new tools in the current workflow:
- How to make it work without any professionaly shot photograph?
- What to do if it doesn’t work as expected?
Let’s start with how to make it work without any professionaly shot photograph.
Preparing Your Photos for Virtual Staging
The Preparation
When preparing photographs for listing sites, you might usually hire a photography crew and a virtual staging service to process the photos further. Some local services offer both parts in one package.
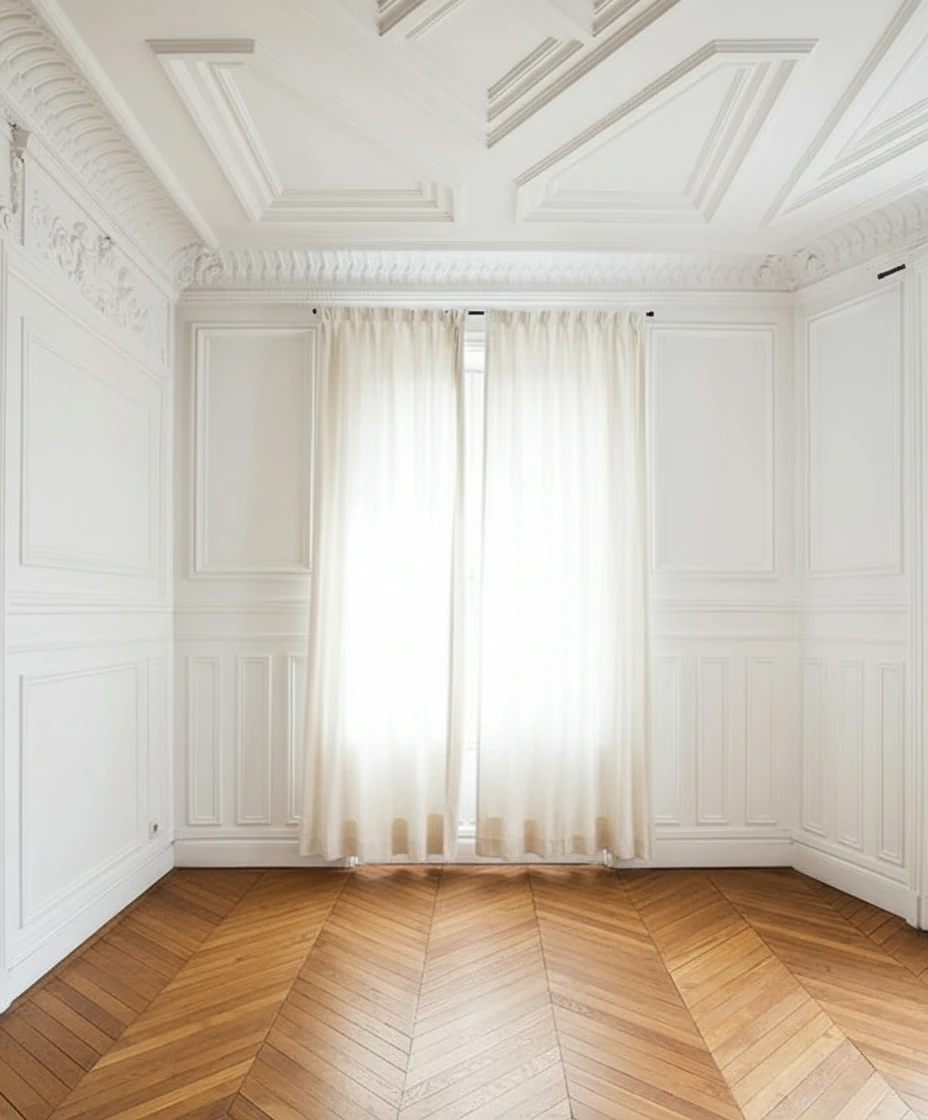
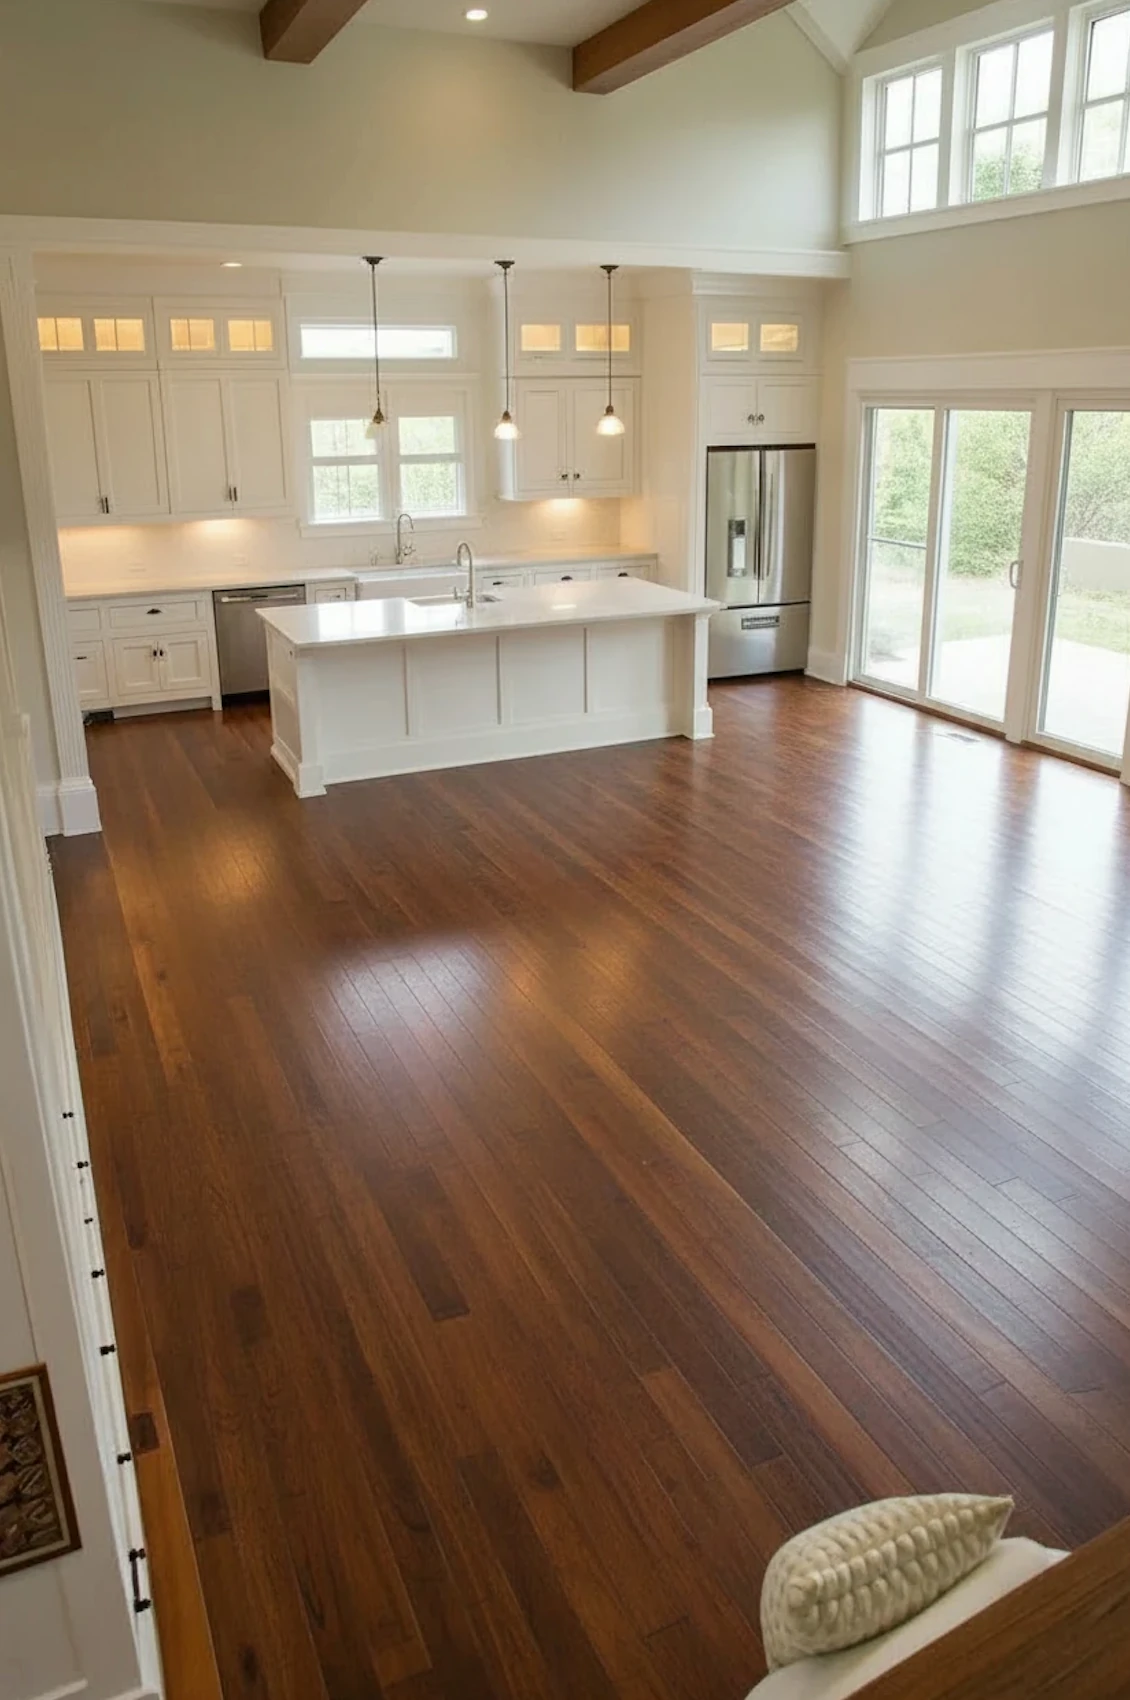
Most traditional virtual staging companies, or AI virtual staging companies that started before 2025, require you to provide clean, well-lit, professional photos for processing, like the one below. This requirement alone can cost you hundreds or even thousands of dollars.

With Banana Designer, it doesn’t have to be like this. You can take photos of the space with your smartphone—no need for a crew—and Banana Designer will take care of the post-processing. Sounds good, right? But you might wonder: what exactly do you need to provide to make this work?
It’s simple: if you provide a well-lit, clean, and professional photo, Banana Designer will stage it with no problem. If you only took a few photos with your phone, you can always clean them up in Banana Designer by adjusting the lighting to create a good foundation for staging.
Cleaning Up Your Photos
Banana Designer offers a wide range of image editing models, each with its own strengths. But don’t worry—you only need to get familiar with two models for staging a room: Nano Banana from Google and GPT4o from OpenAI.
Remove the coffee table in the middle and the plants on it too.
- For 90% of tasks like removing objects, cleaning up bed sheets, or changing furniture, use Nano Banana. It excels with specific instructions for changing any element in the image. It doesn't just change what you specified, it also fix the image with awareness of the environment automatically. Look at the image above, when the coffee table gets removed, the light casted on to the rug is rendered based on the shape of the window behind.
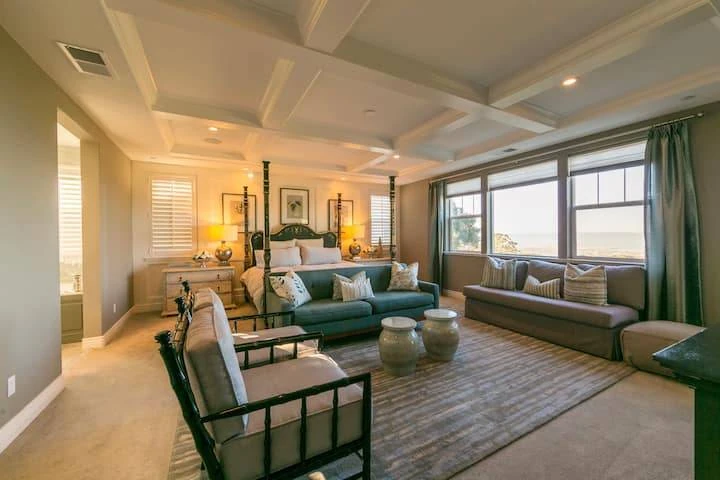
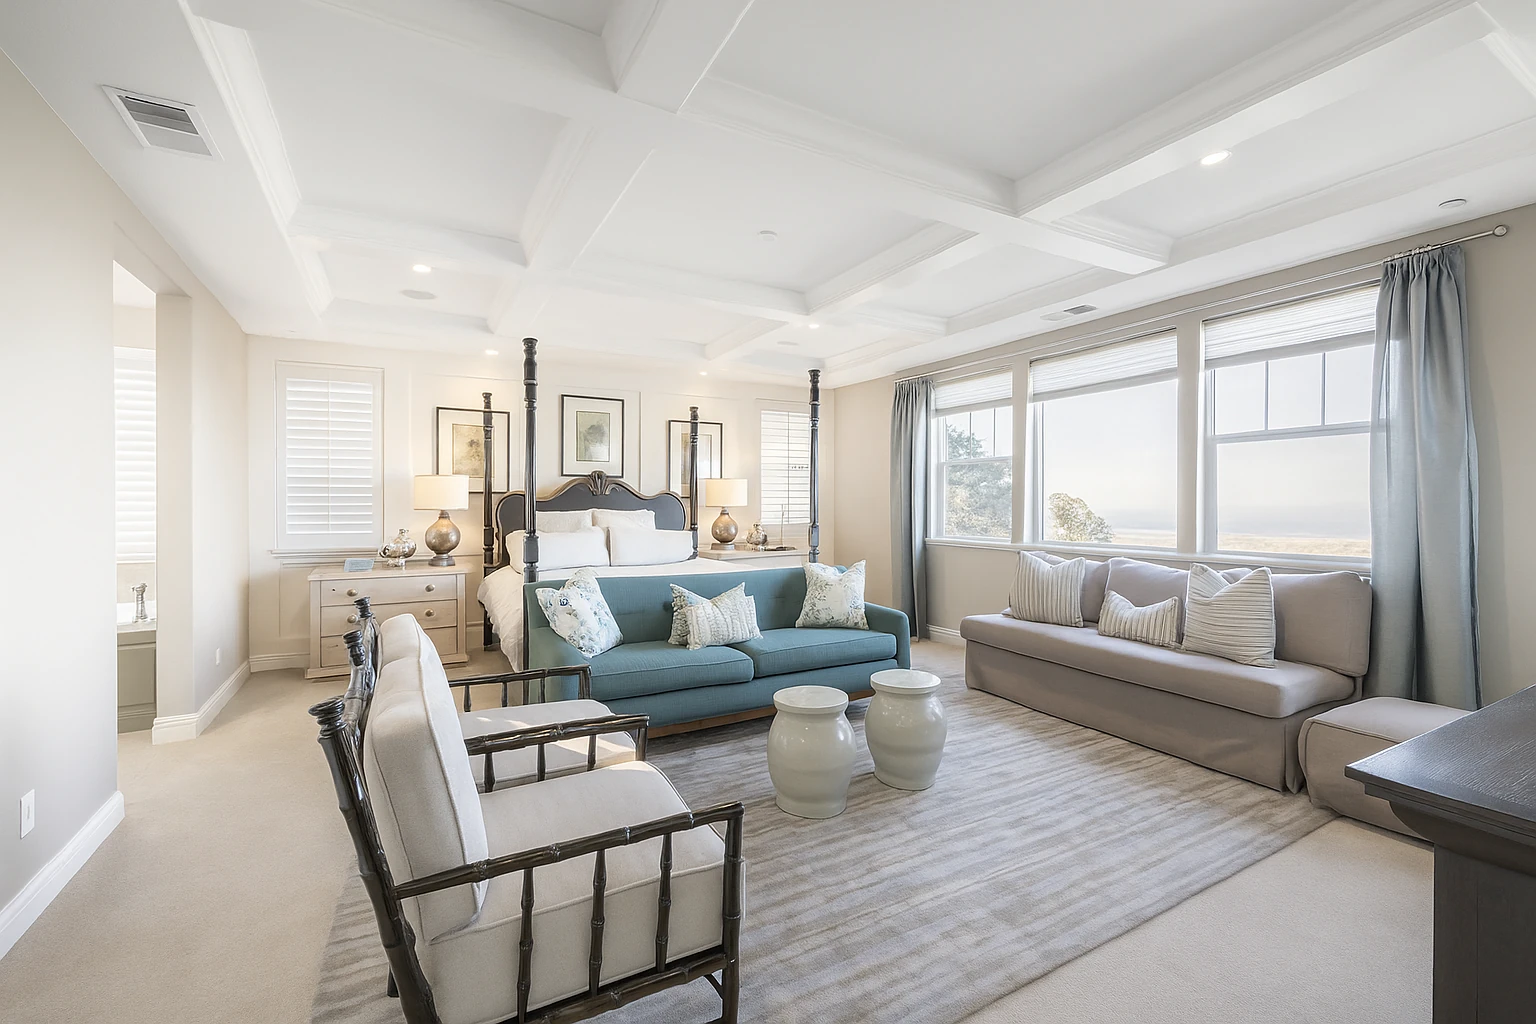
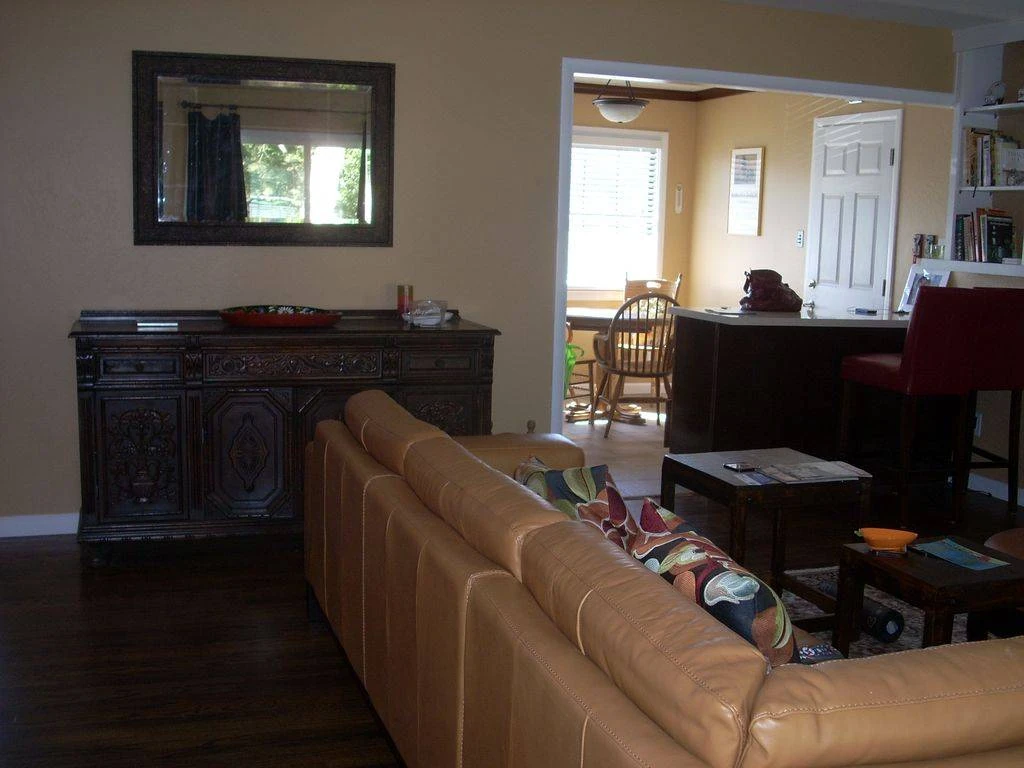
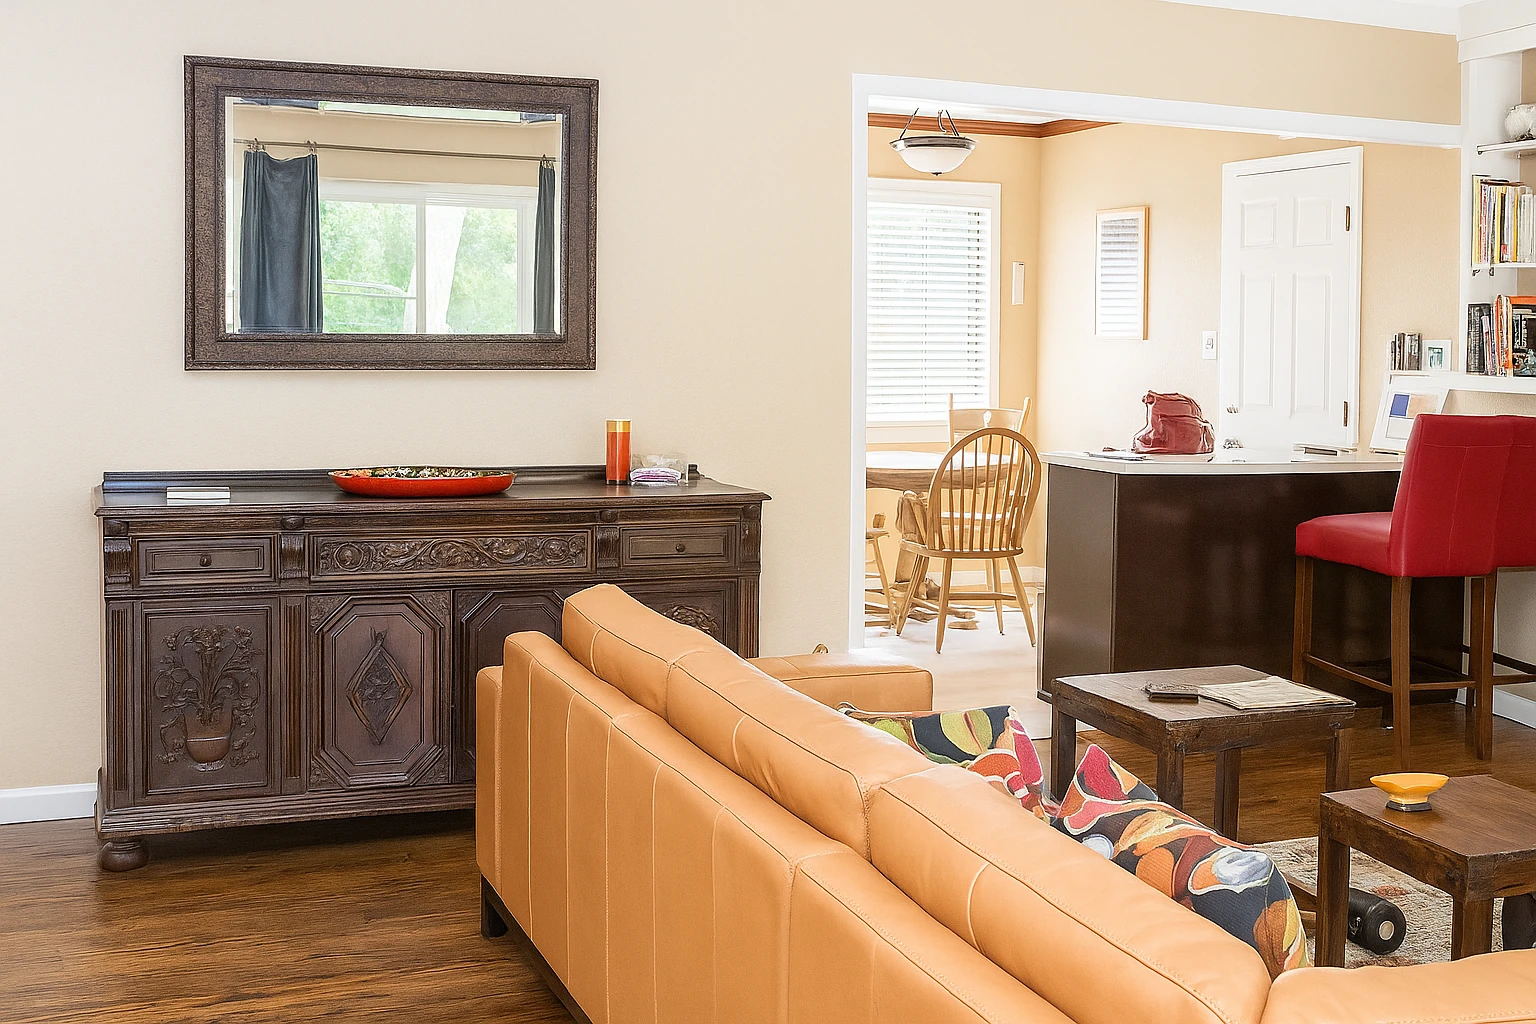
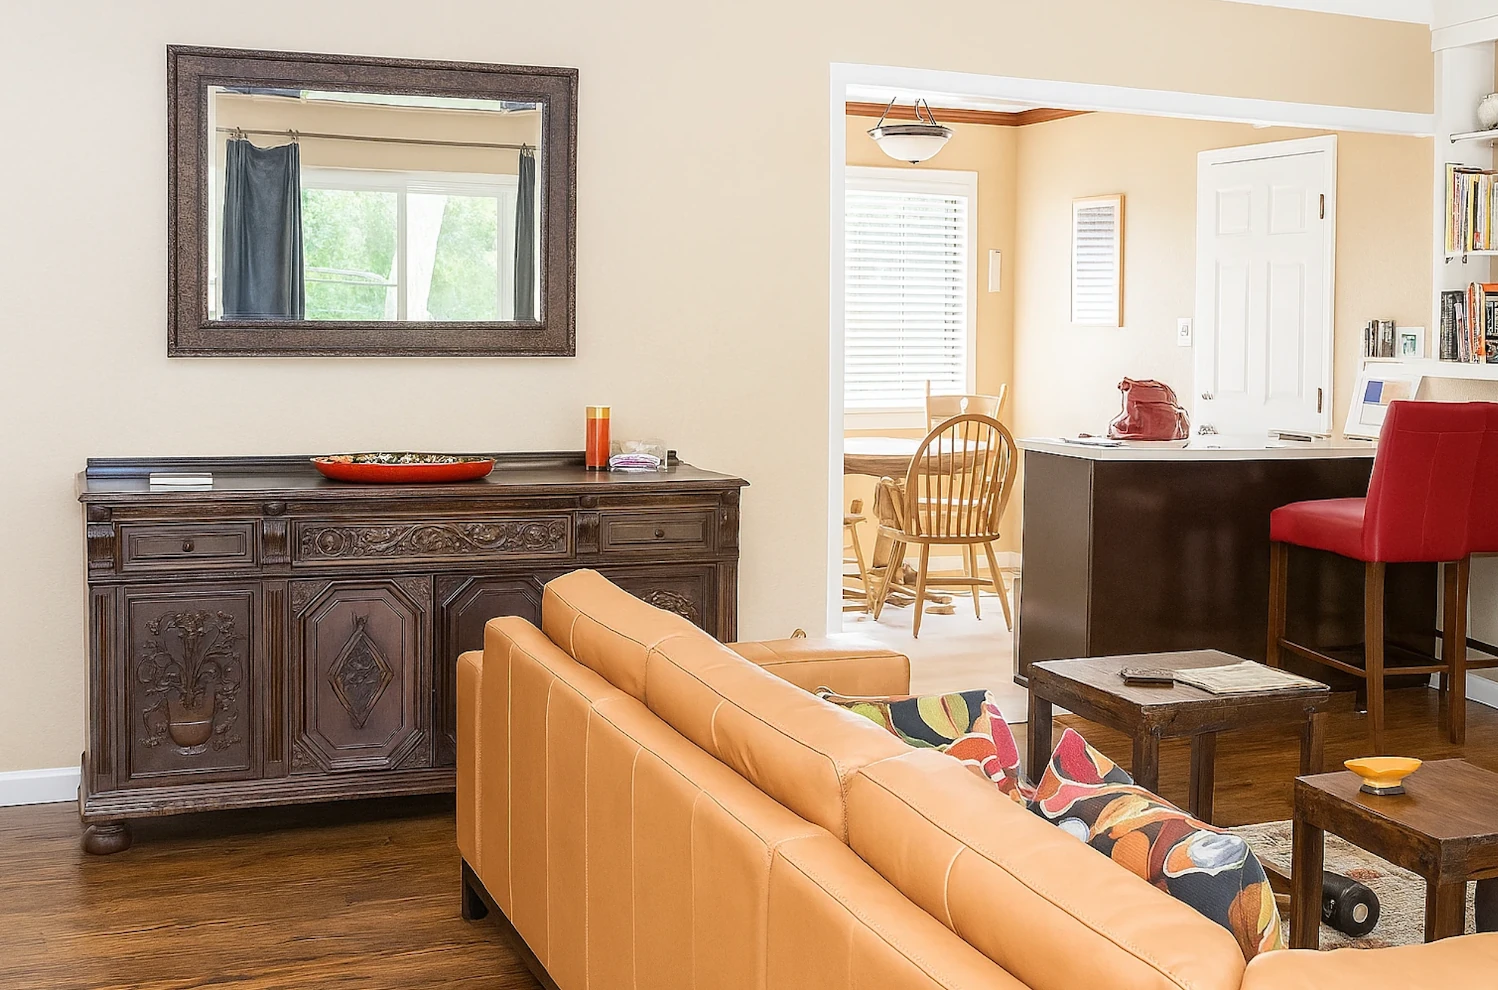
Recreate this interior photo with realistic daylight exposure and tonal balance suitable for professional real estate photography. Simulate natural sunlight coming from the window at the back, filling the room evenly with soft ambient light. Adjust exposure so that the wall tones remains with visible surface texture without glare or flash. Reduce warm color cast from the walls while maintaining a gentle warmth in wooden furniture. Balance highlights and shadows with smooth tonal transitions—no harsh contrast or clipped whites. Ensure reflective surfaces such as the wood cabinet and mirror frame show soft, diffused reflections instead of sharp glare. Preserve fine texture on the sofa fabric and floor. Apply subtle HDR-style tone mapping so both indoor and outdoor areas are visible naturally. The final image should feel bright, neutral, and professionally shot, like an MLS-ready daylight photo
- GPT4o is best for changing or optimizing lighting conditions—whether it's adjusting exposure, changing the room’s lighting, or simulating different times of day. GPT4o is better at reasoning, so it can relight the whole room by making reasonable adjustments to every corner of the photo. Be aware that making lighting adjustments to a room is very different from just tone up the brightness, shadows, reflections and colour temperature all changes. GPT4o will also create a higher resolution image even when the input is low, like the example shown above.
So, if your room is underexposed, overexposed, or already staged but you want to show it in the evening, use GPT4o first.
If you’re happy with the overall lighting but need to alter some elements in the image, stick to Nano Banana. Tasks like deep cleaning, decluttering, and making repairs are handled well by Nano Banana.
Once you have a clean, well-lit, professional photo of your room, you can move on to the next step—staging.
Virtual Staging Your Room
The Importance of Realistic Staging
In real estate, it’s important to showcase the full potential of the property to sell it well. But virtual staging isn’t about faking the look or making the room appear different from reality. Buyers will physically visit the space and will be disappointed if the photos misrepresent it.
This is why Banana Designer is perfect for virtual staging—it doesn’t change the room’s structure or exaggerate anything. It simply enhances the space realistically.
Your Staging Options
You have two options:
- Stage the room with one setup and call it a day.
- Stage the room with different setups for different buyers and use one of them on the listing site.
Option 2 wasn't possible before because editing multiple versions took a lot of effort and costs too much. But with Banana Designer, you can stage a room for as little as $0.05 per image. Creating five variations won't hurt, and it lets you tailor options for different buyer types. Being cheap isn't just about saving money—it's about having more options and offering more value.
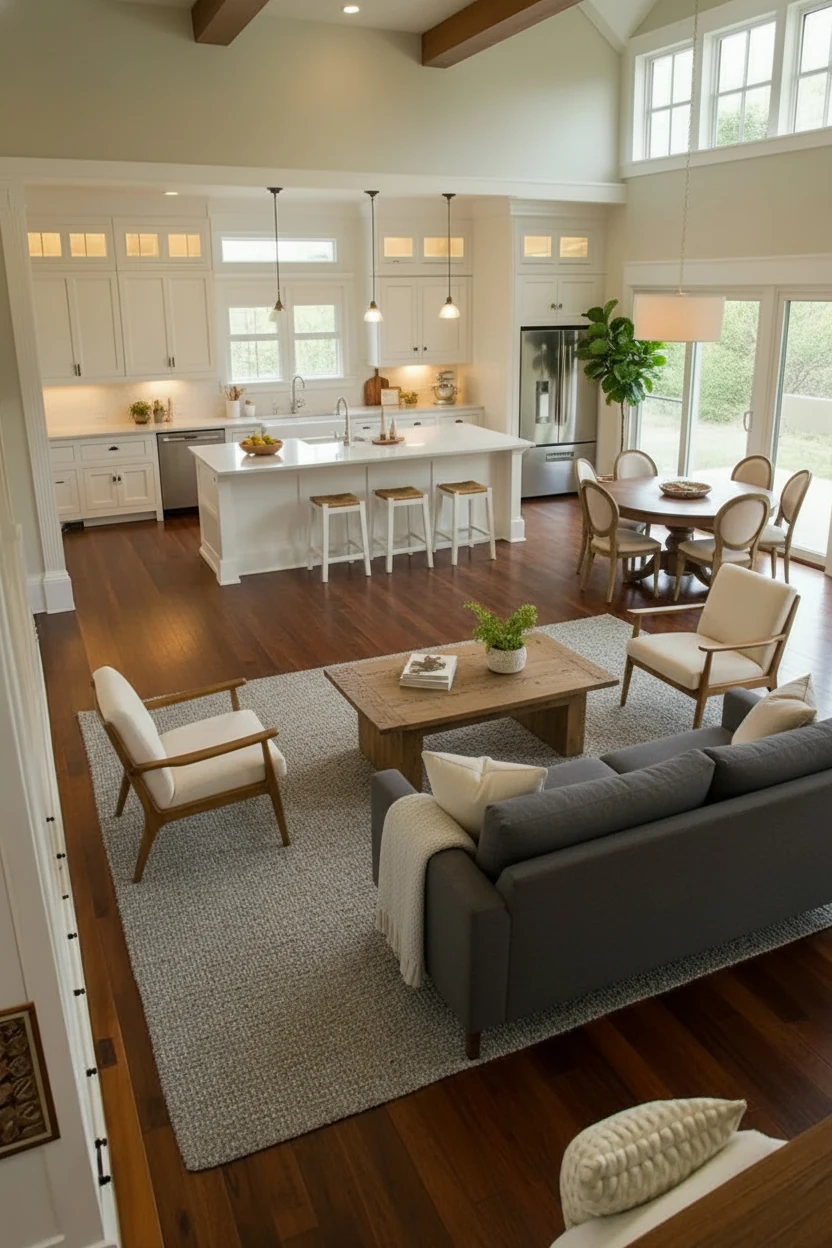
Example: Empty Living Room Transformation
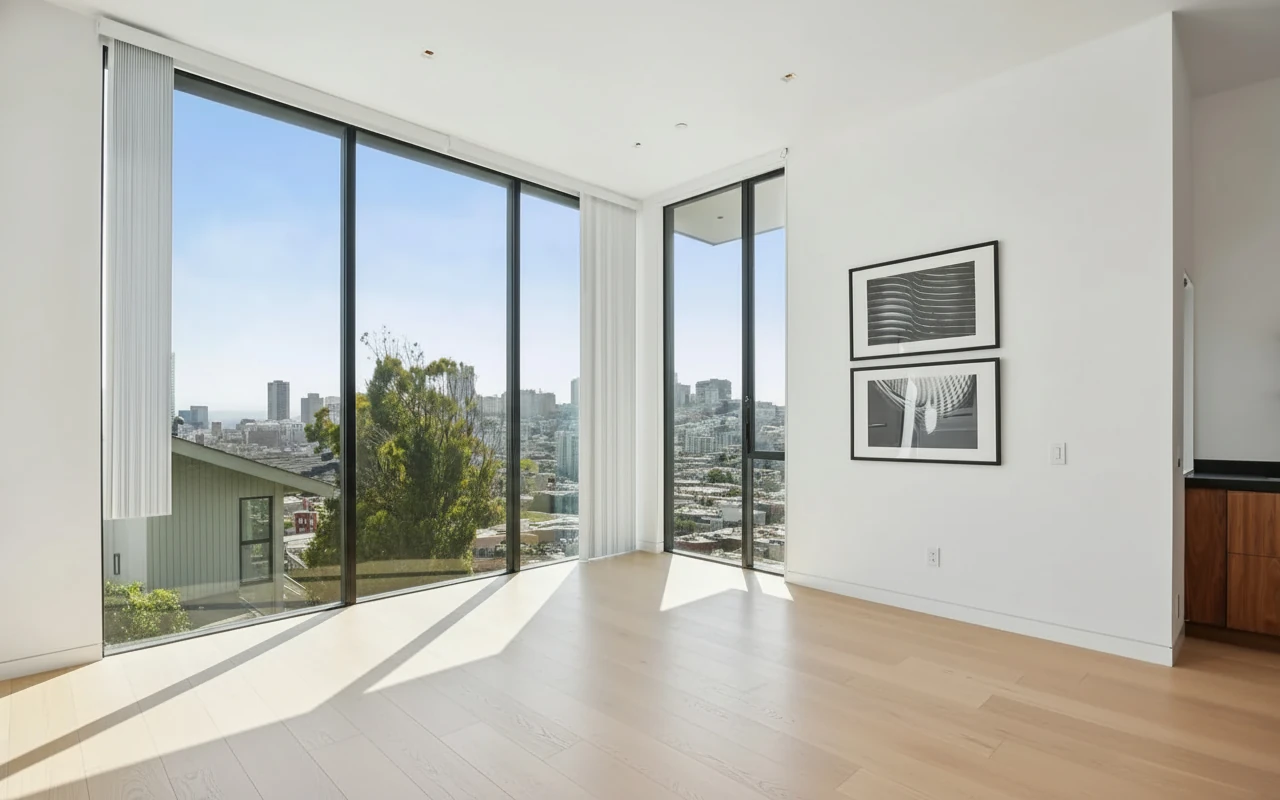
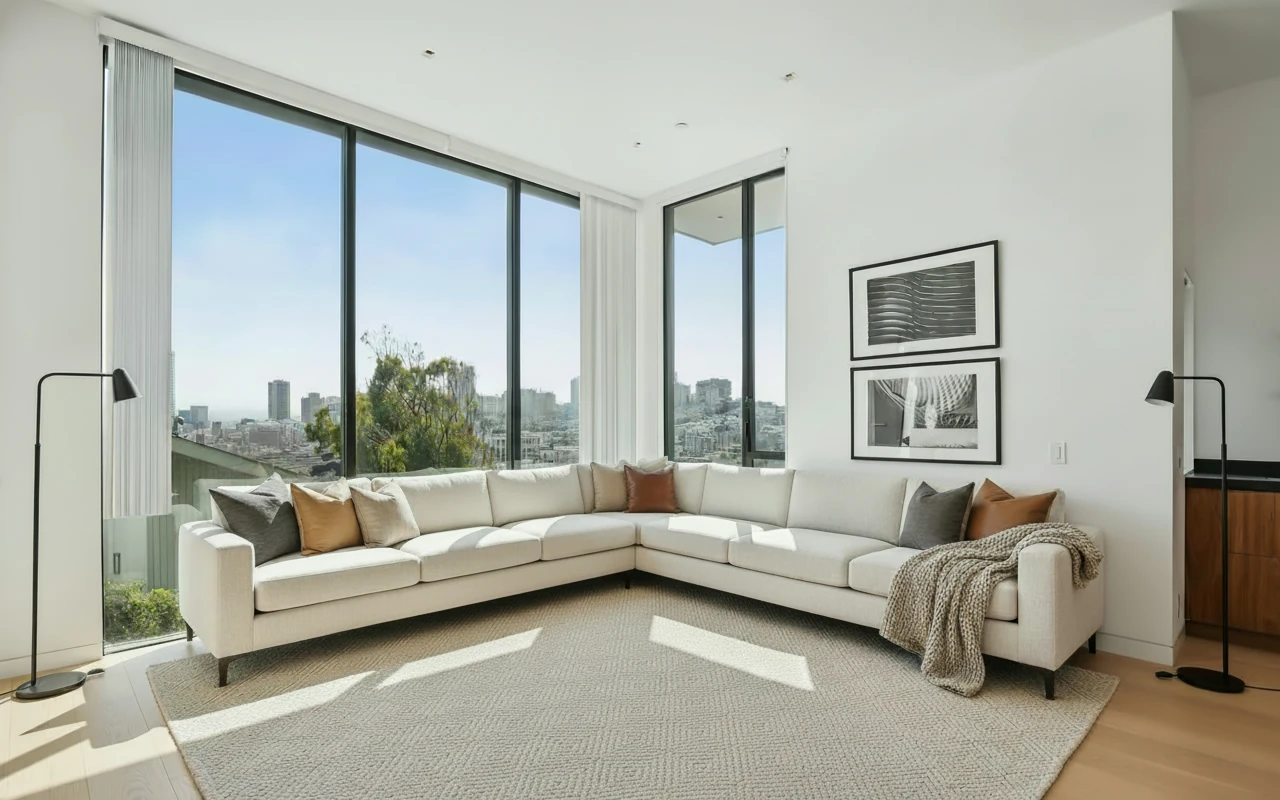
Here's an example of how AI virtual staging can transform an empty living room into a beautifully furnished space:
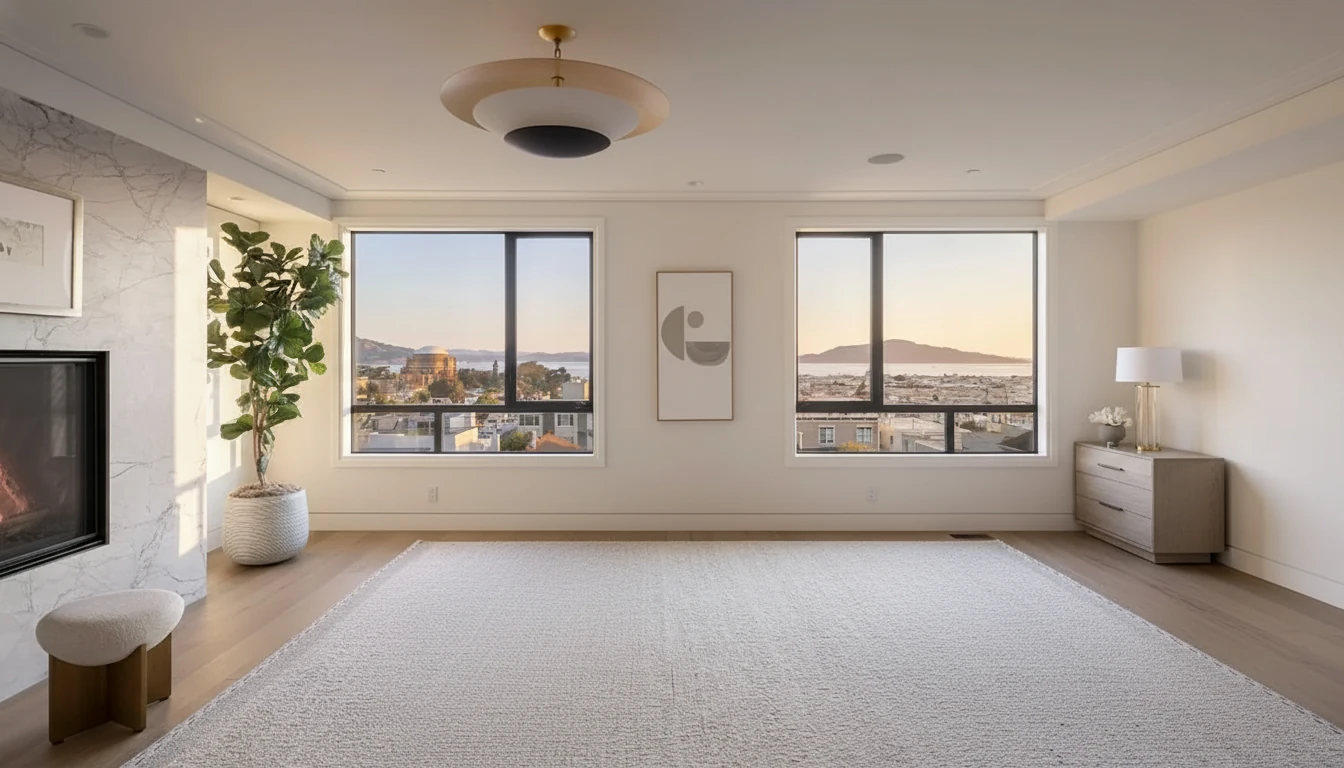
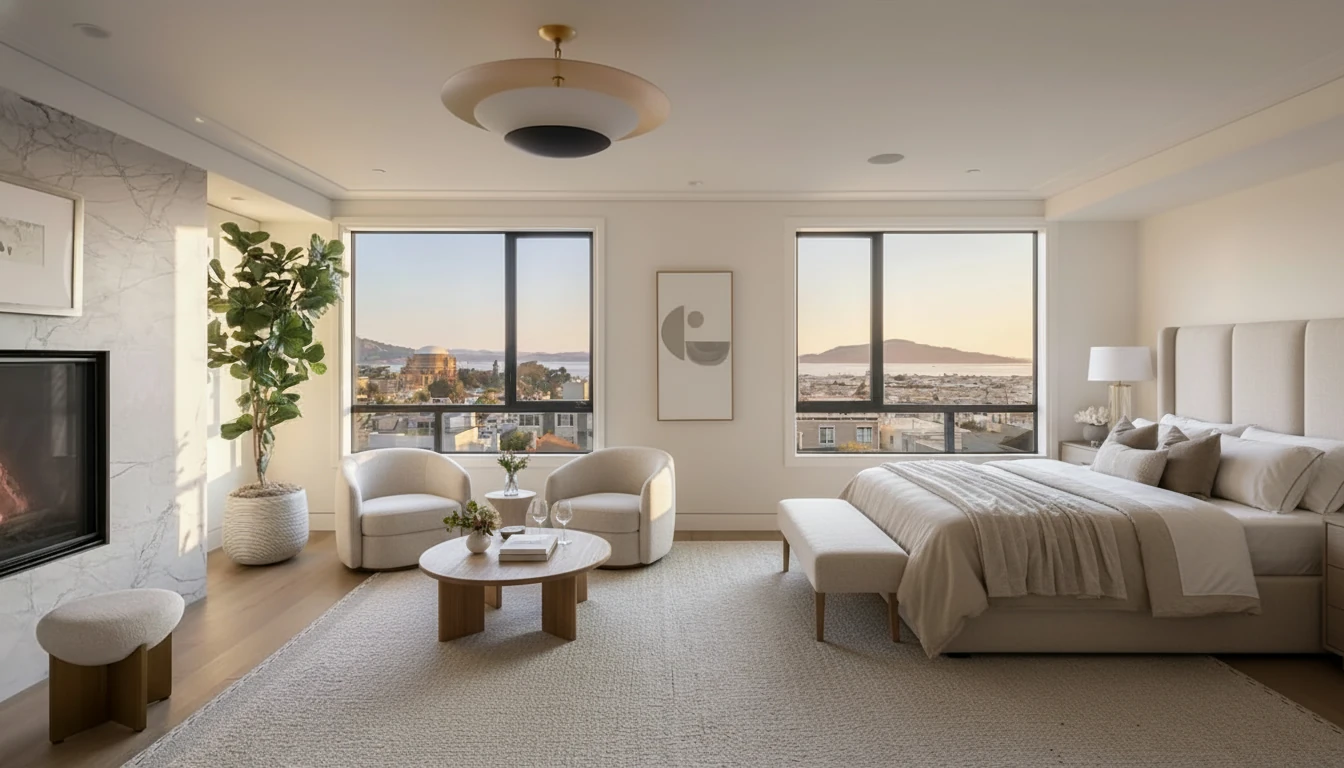
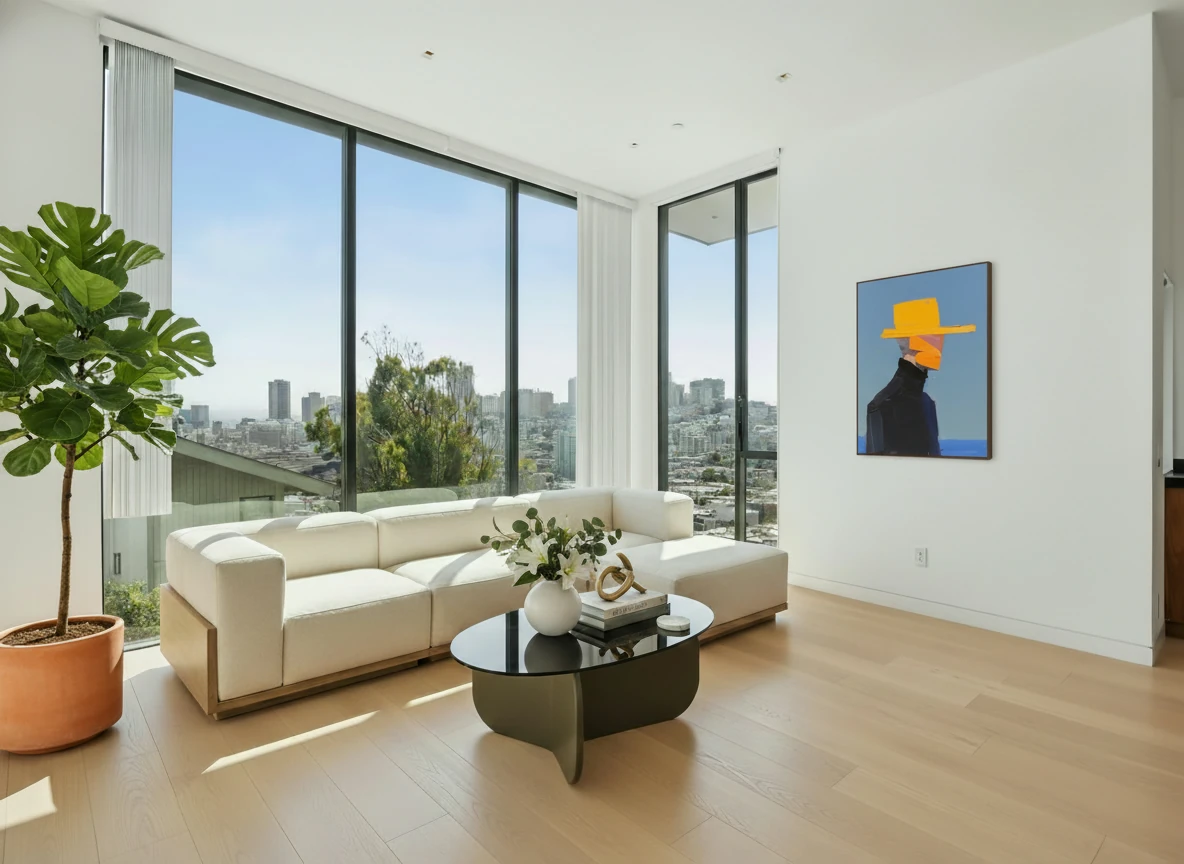
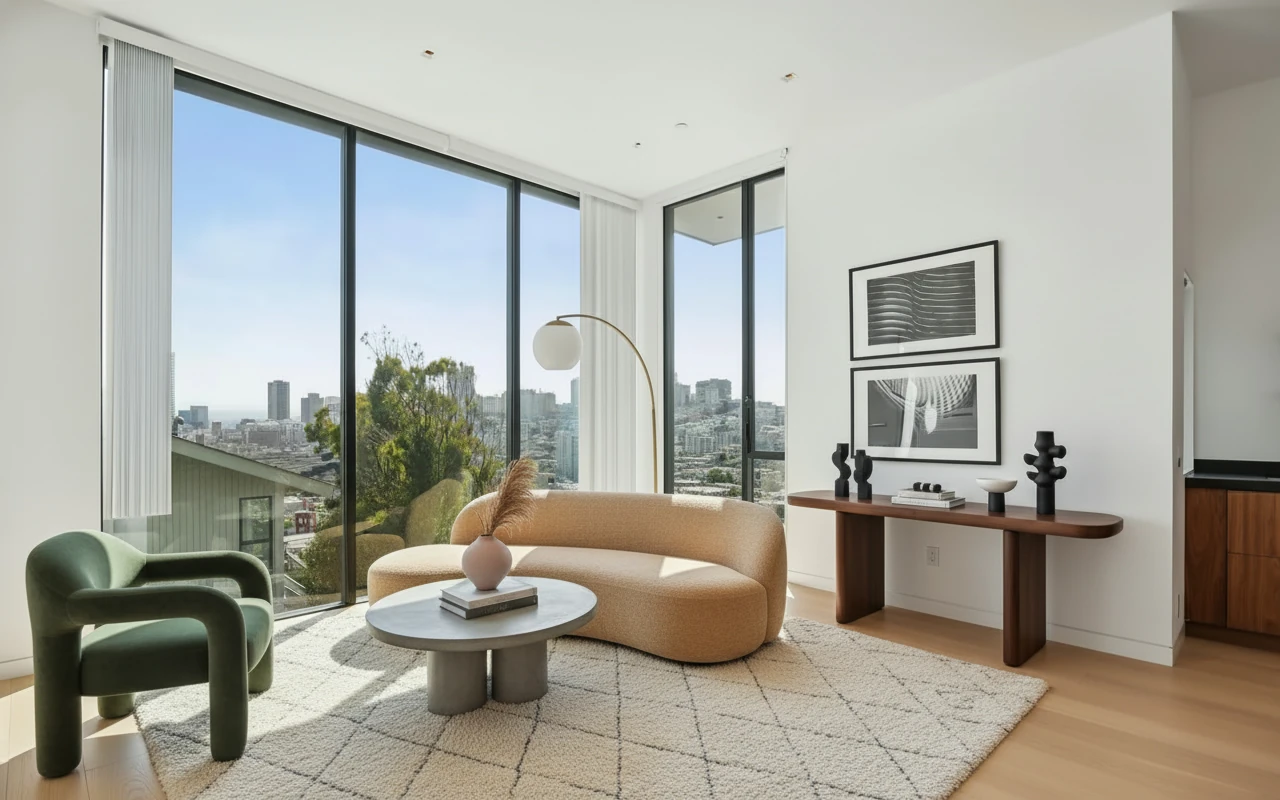
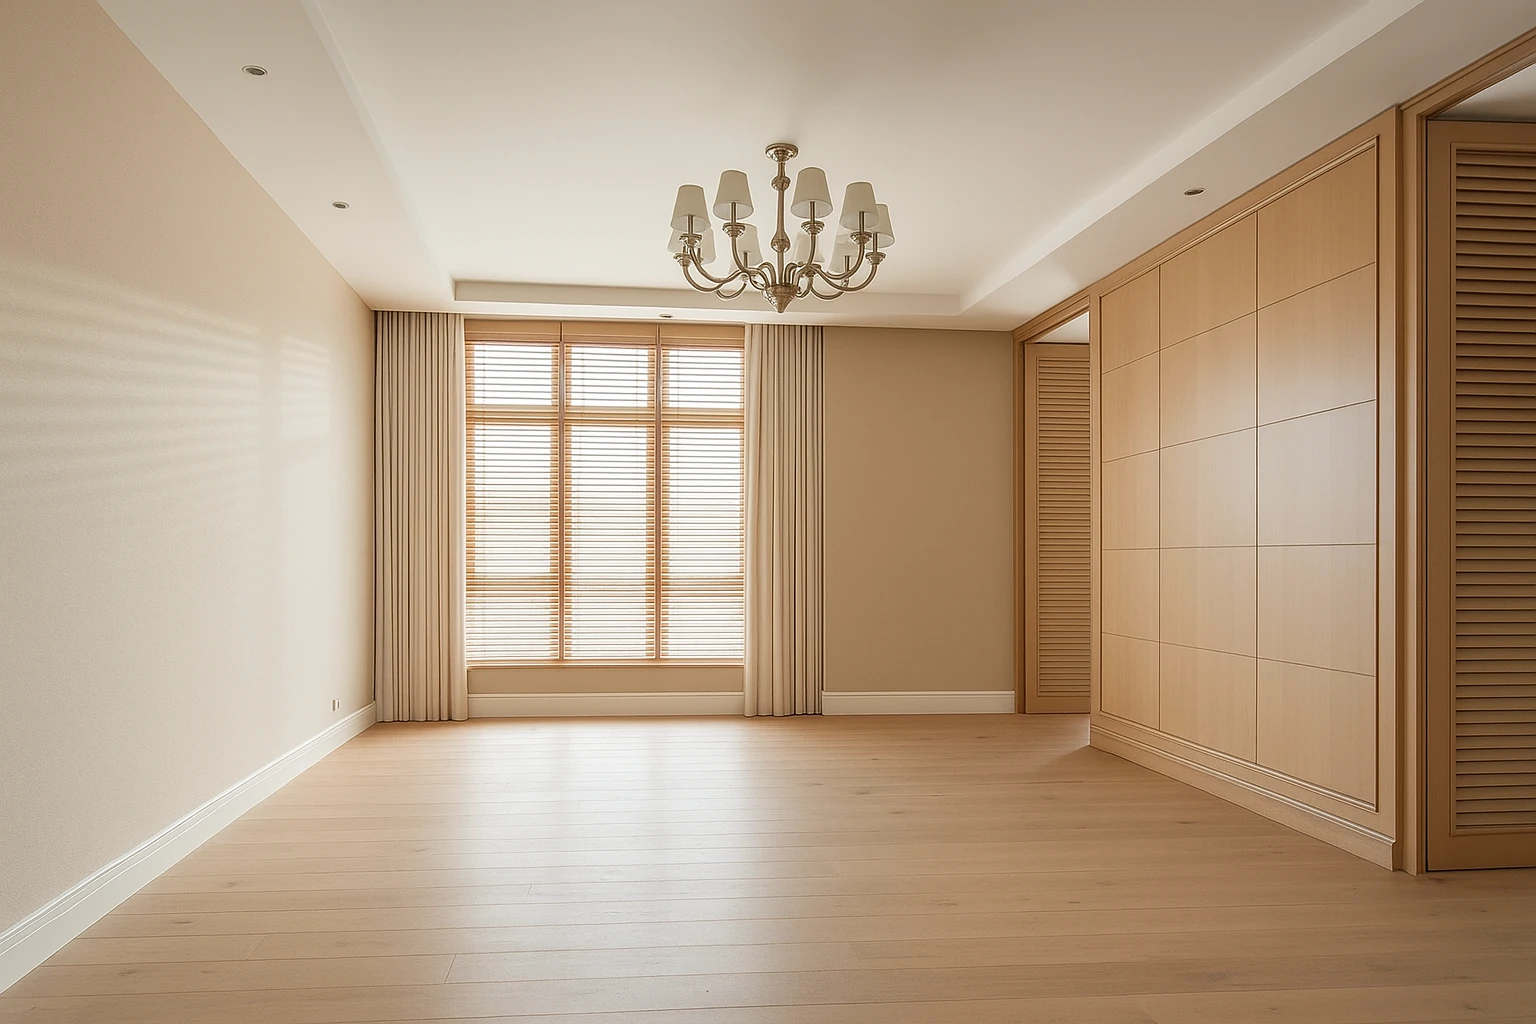
Furnish this bedroom, and make it arranged with a spacious, balanced layout centered around a large bed on the right wall. The bed features a tall upholstered headboard, layered beige bedding, and matching pillows, with a long bench positioned at the foot. On the right side of the bed, a nightstand holds a lamp with a white shade and small decor. In front of the windows, two rounded armchairs form a sitting area facing a low oval coffee table with a book, vase, and wine glasses on top. A small stool sits near the fireplace on the left, which is framed with light marble. A tall potted plant fills the corner between the fireplace and windows, softening the transition. The furniture is placed to emphasize symmetry, open sightlines, and comfort while framing the city and bay views through the large windows.
If you prefer option 1 and want something simple, here are some tips:
| Room Type | Staging Tips |
|---|---|
| Living Room | - Use neutral colors and minimal furniture to create a spacious feel. |
| - Add cozy elements like throw pillows and a rug to make it inviting. | |
| - Ensure good lighting, both natural and artificial, to highlight key features. | |
| Bedroom | - Keep bedding simple and fresh with neutral tones. |
| - Incorporate a throw blanket in neutral colors. | |
| - Add bedside lamps and soft lighting for a warm ambiance. | |
| Kitchen | - Clear countertops of clutter and appliances. |
| - Highlight clean, shiny surfaces and organized cabinets. | |
| - Use fresh flowers or a bowl of fruit for a touch of color and life. | |
| Bathroom | - Ensure all fixtures are spotless and free of water spots. |
| - Use fresh towels and minimal decor to keep it clean and functional. | |
| - Use neutral tones. | |
| Dining Room | - Set the table with simple, elegant place settings. |
| - Use a centerpiece like a vase with fresh flowers. | |
| - Keep furniture polished and space uncluttered to emphasize room size. | |
| Office | - Organize desk and shelves to look neat and professional. |
| - Use ergonomic furniture that fits the space well. | |
| - Add a plant or artwork to create a welcoming environment. | |
| Exterior | - Maintain a clean and tidy yard with trimmed grass and bushes. |
| - Add outdoor furniture or potted plants to create an inviting entry. | |
| - Ensure all exterior lighting works and highlights the home’s curb appeal. |
Once you get here, use the prompt composer on the page to try a few prompts with your existing photos, clean them up, and get them staged. While doing this, you might encounter some common issues, which we’ll cover next.
Common Pitfalls and How to Fix Them
1. Your Prompt Is Too Simple
The problem isn’t simplicity itself, but unspoken requirements in your mind. This is common because sometimes we get lazy or don’t know how to describe what we want.

Add furniture to my image
If you just say "Add furniture to my image", it will certainly work as instructed, but what about the style or the layout? Of course you can start with this, and get a sense of what it might look like, but if you have any further preferences, do the following:
There are two ways to enhance it:
- Use comprehensive prompts—let ChatGPT or any AI create a better, more detailed prompt for you.
- Use an image as a reference—one with specific furniture or a desired decor style.


Add the sofa from image 2 and coffee table from image 3 to the room in image 1, put the sofa against the corner, and place the coffee table in front of it, and recreate the same FOV of the room with the furniture of image 1.
When using reference images, make sure you specify enough information for the AI to understand what exactly to reference—is it the furniture, the decor, or other visual elements? Another fix is to send the reference photo to ChatGPT and let it create a prompt based on the image, extracting styles or other details you want. Then you can use the answer to help you create the full prompt to be used in Banana Designer.
2. Trying to Do Too Much at Once
Sometimes, you might prompt something like “remove this rug, change the wall colour, and add that furniture…” While being specific is good, the more requirements you add, the less attention AI pays to each, and it might not execute everything you ask for.
Example:
Step 1, focus adding plants to multiple places.
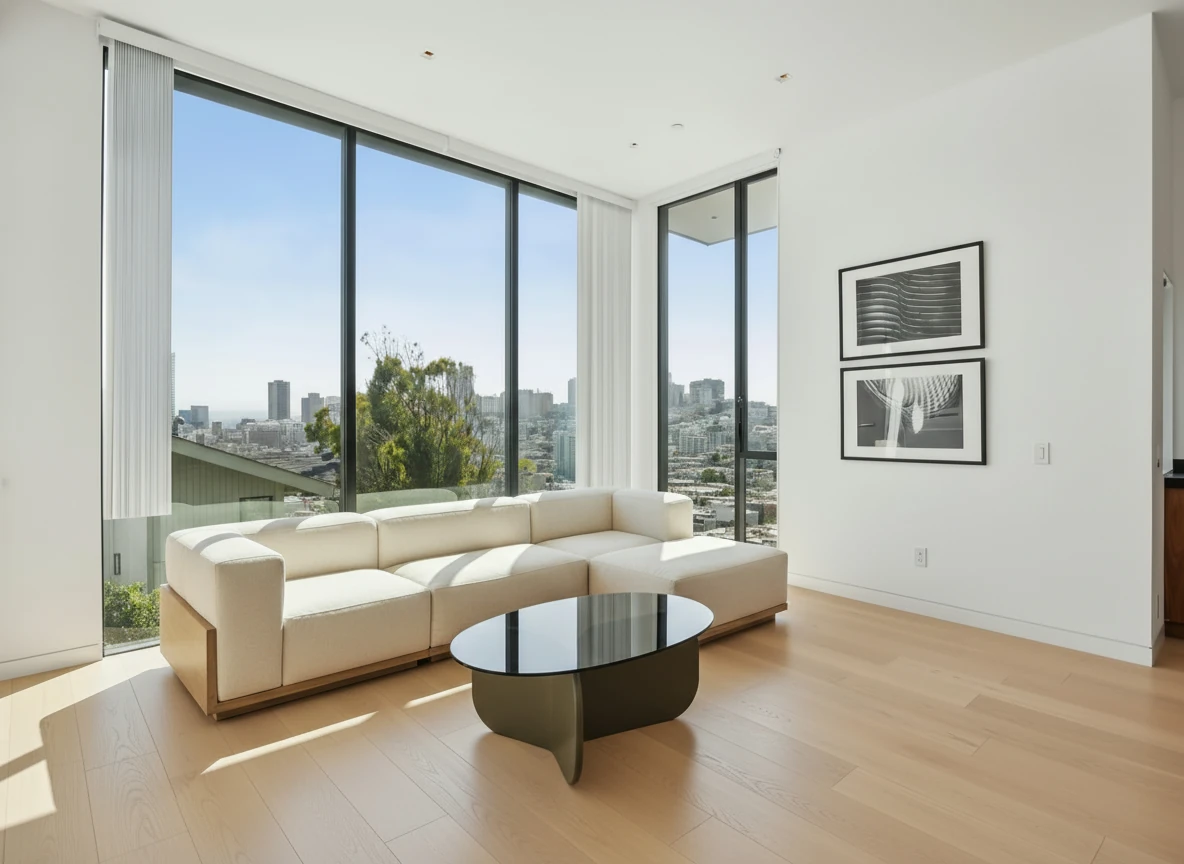
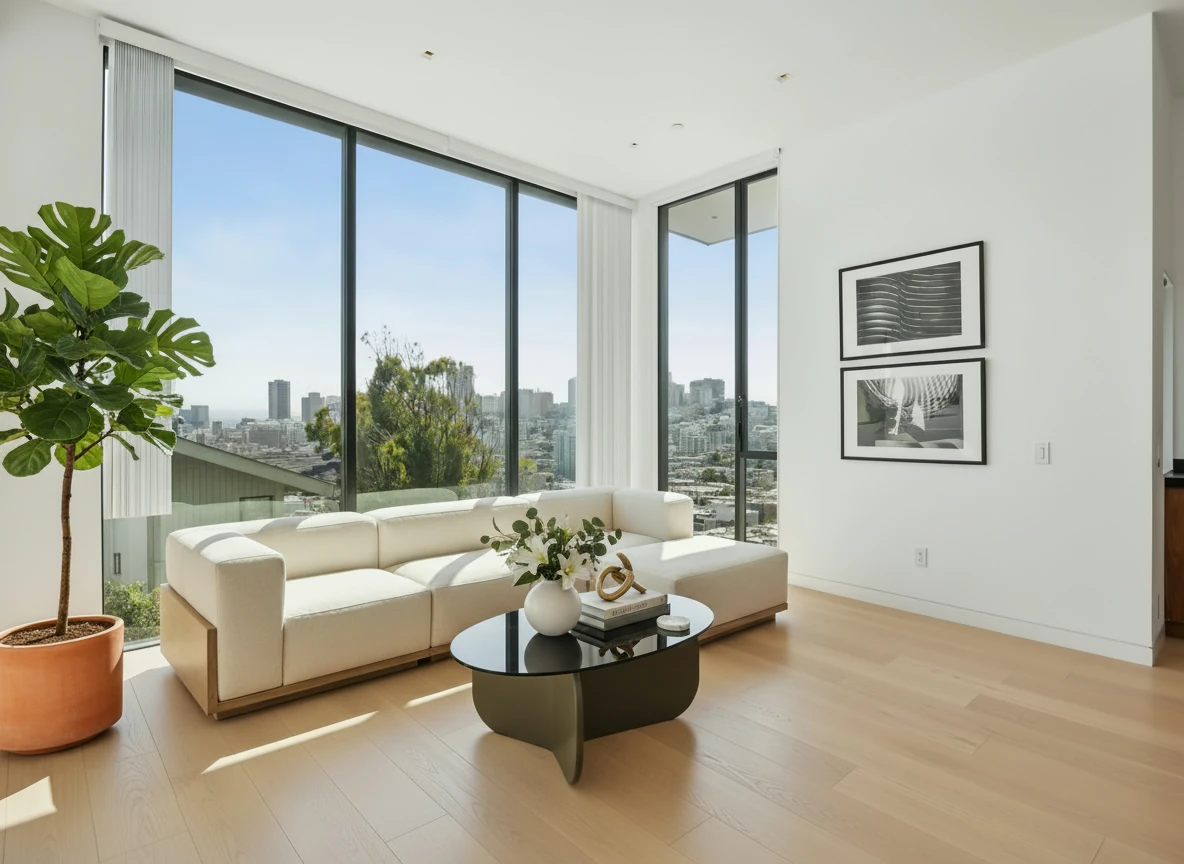
Place some decorative items and flowers on top of the coffee table, and add a Swiss Cheese Plant on the left of the sofa.
Step 2, taking the result from image 1, and focus on replacing artworks with a reference image.

Replace the two artworks on the wall from image 1 with the painting from image 2
The fix: break it down into multiple steps. Think of it as physically decorating the room—do cleanup in step one, removing everything you don’t need, then add furniture in the next step.
3. Misplaced Furniture
This is a common issue. The fix is to be specific about the furniture’s location in the physical space (e.g., next to the window), its orientation (facing the door or camera), and its position in the image (taking up the lower third).
Example:
This one shows a good result, but some furnitures like the dining table might not be placed in the best position, or maybe you don't even want a dining table. What you should be doing is to add a few more words on your desired layout or furniture placement.
fill the room with furniture
4. Staged Photos Don’t Look as Good as Listing Examples
This can happen if you didn’t properly clean up the room and staged it on a poor-quality photo.
The fix is simple: use the following prompt with GPT4o to transform the photo into a professionally photographed room first, then make further adjustments.
Step 1: turn it into a professionally shot photograph, fixing light and tilted FOV. Use the prompt or adjusted it according to your situation.
Recreate this interior photo with realistic daylight exposure and tonal balance suitable for professional real estate photography. Simulate natural sunlight coming from the window at the left, filling the room evenly with soft ambient light. Adjust exposure so that the wall tones remain light beige with visible surface texture, and the white trim stays neutral white without glare or flash. Reduce warm color cast from the walls by slightly cooling the white balance, while maintaining a gentle warmth in wooden furniture. Balance highlights and shadows with smooth tonal transitions—no harsh contrast or clipped whites. Ensure reflective surfaces such as the wood cabinet and mirror frame show soft, diffused reflections instead of sharp glare. Preserve fine texture on the sofa fabric and floor. Apply subtle HDR-style tone mapping so both indoor and outdoor areas are visible naturally. The final image should feel bright, neutral, and professionally shot, like an MLS-ready daylight photo.
Step 2: Remove all furnitures, a simple prompt like the one below will do.
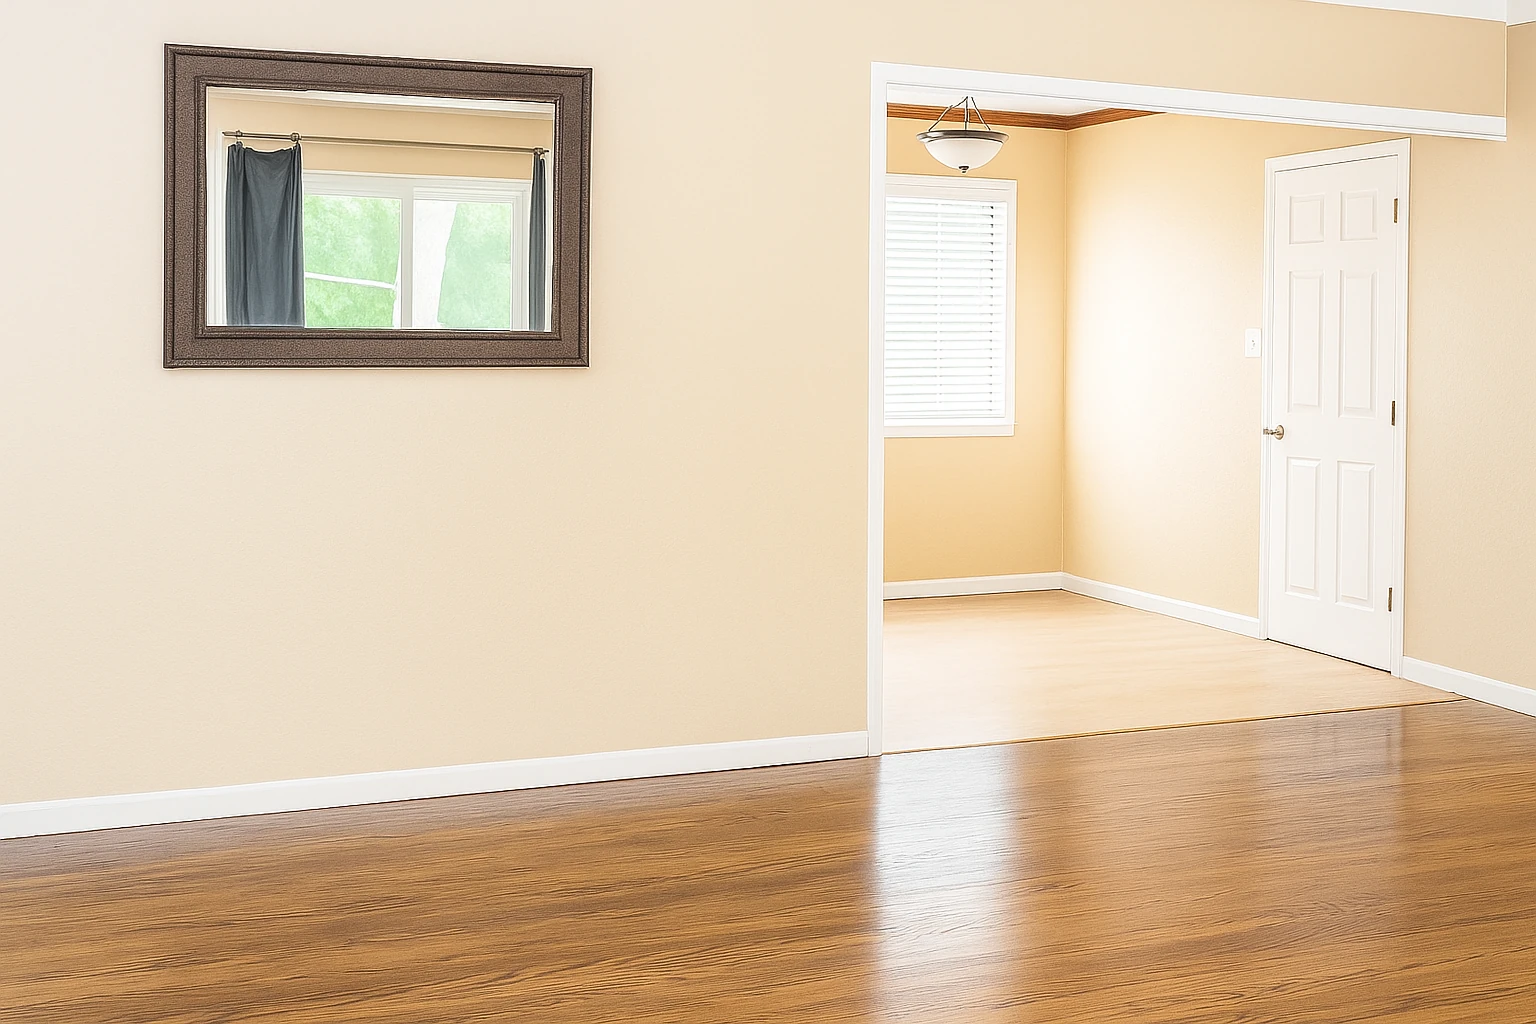
Turn this room into an empty room without furniture
Both steps above should work better with GPT4o. Then you are at a great starting point to stage this room
Advanced Tips for Better Virtual Staging
1. Maintain Consistency
If you’re staging a whole apartment or house rather than a single room, experiment with your first room to create a prompt that captures the desired style. Once you’re happy with the outcome, use the same style description on all photos. Make sure all photos are equally adjusted in terms of cleanup and lighting.
Example: I created a reusable style prompt and add it to all the rooms
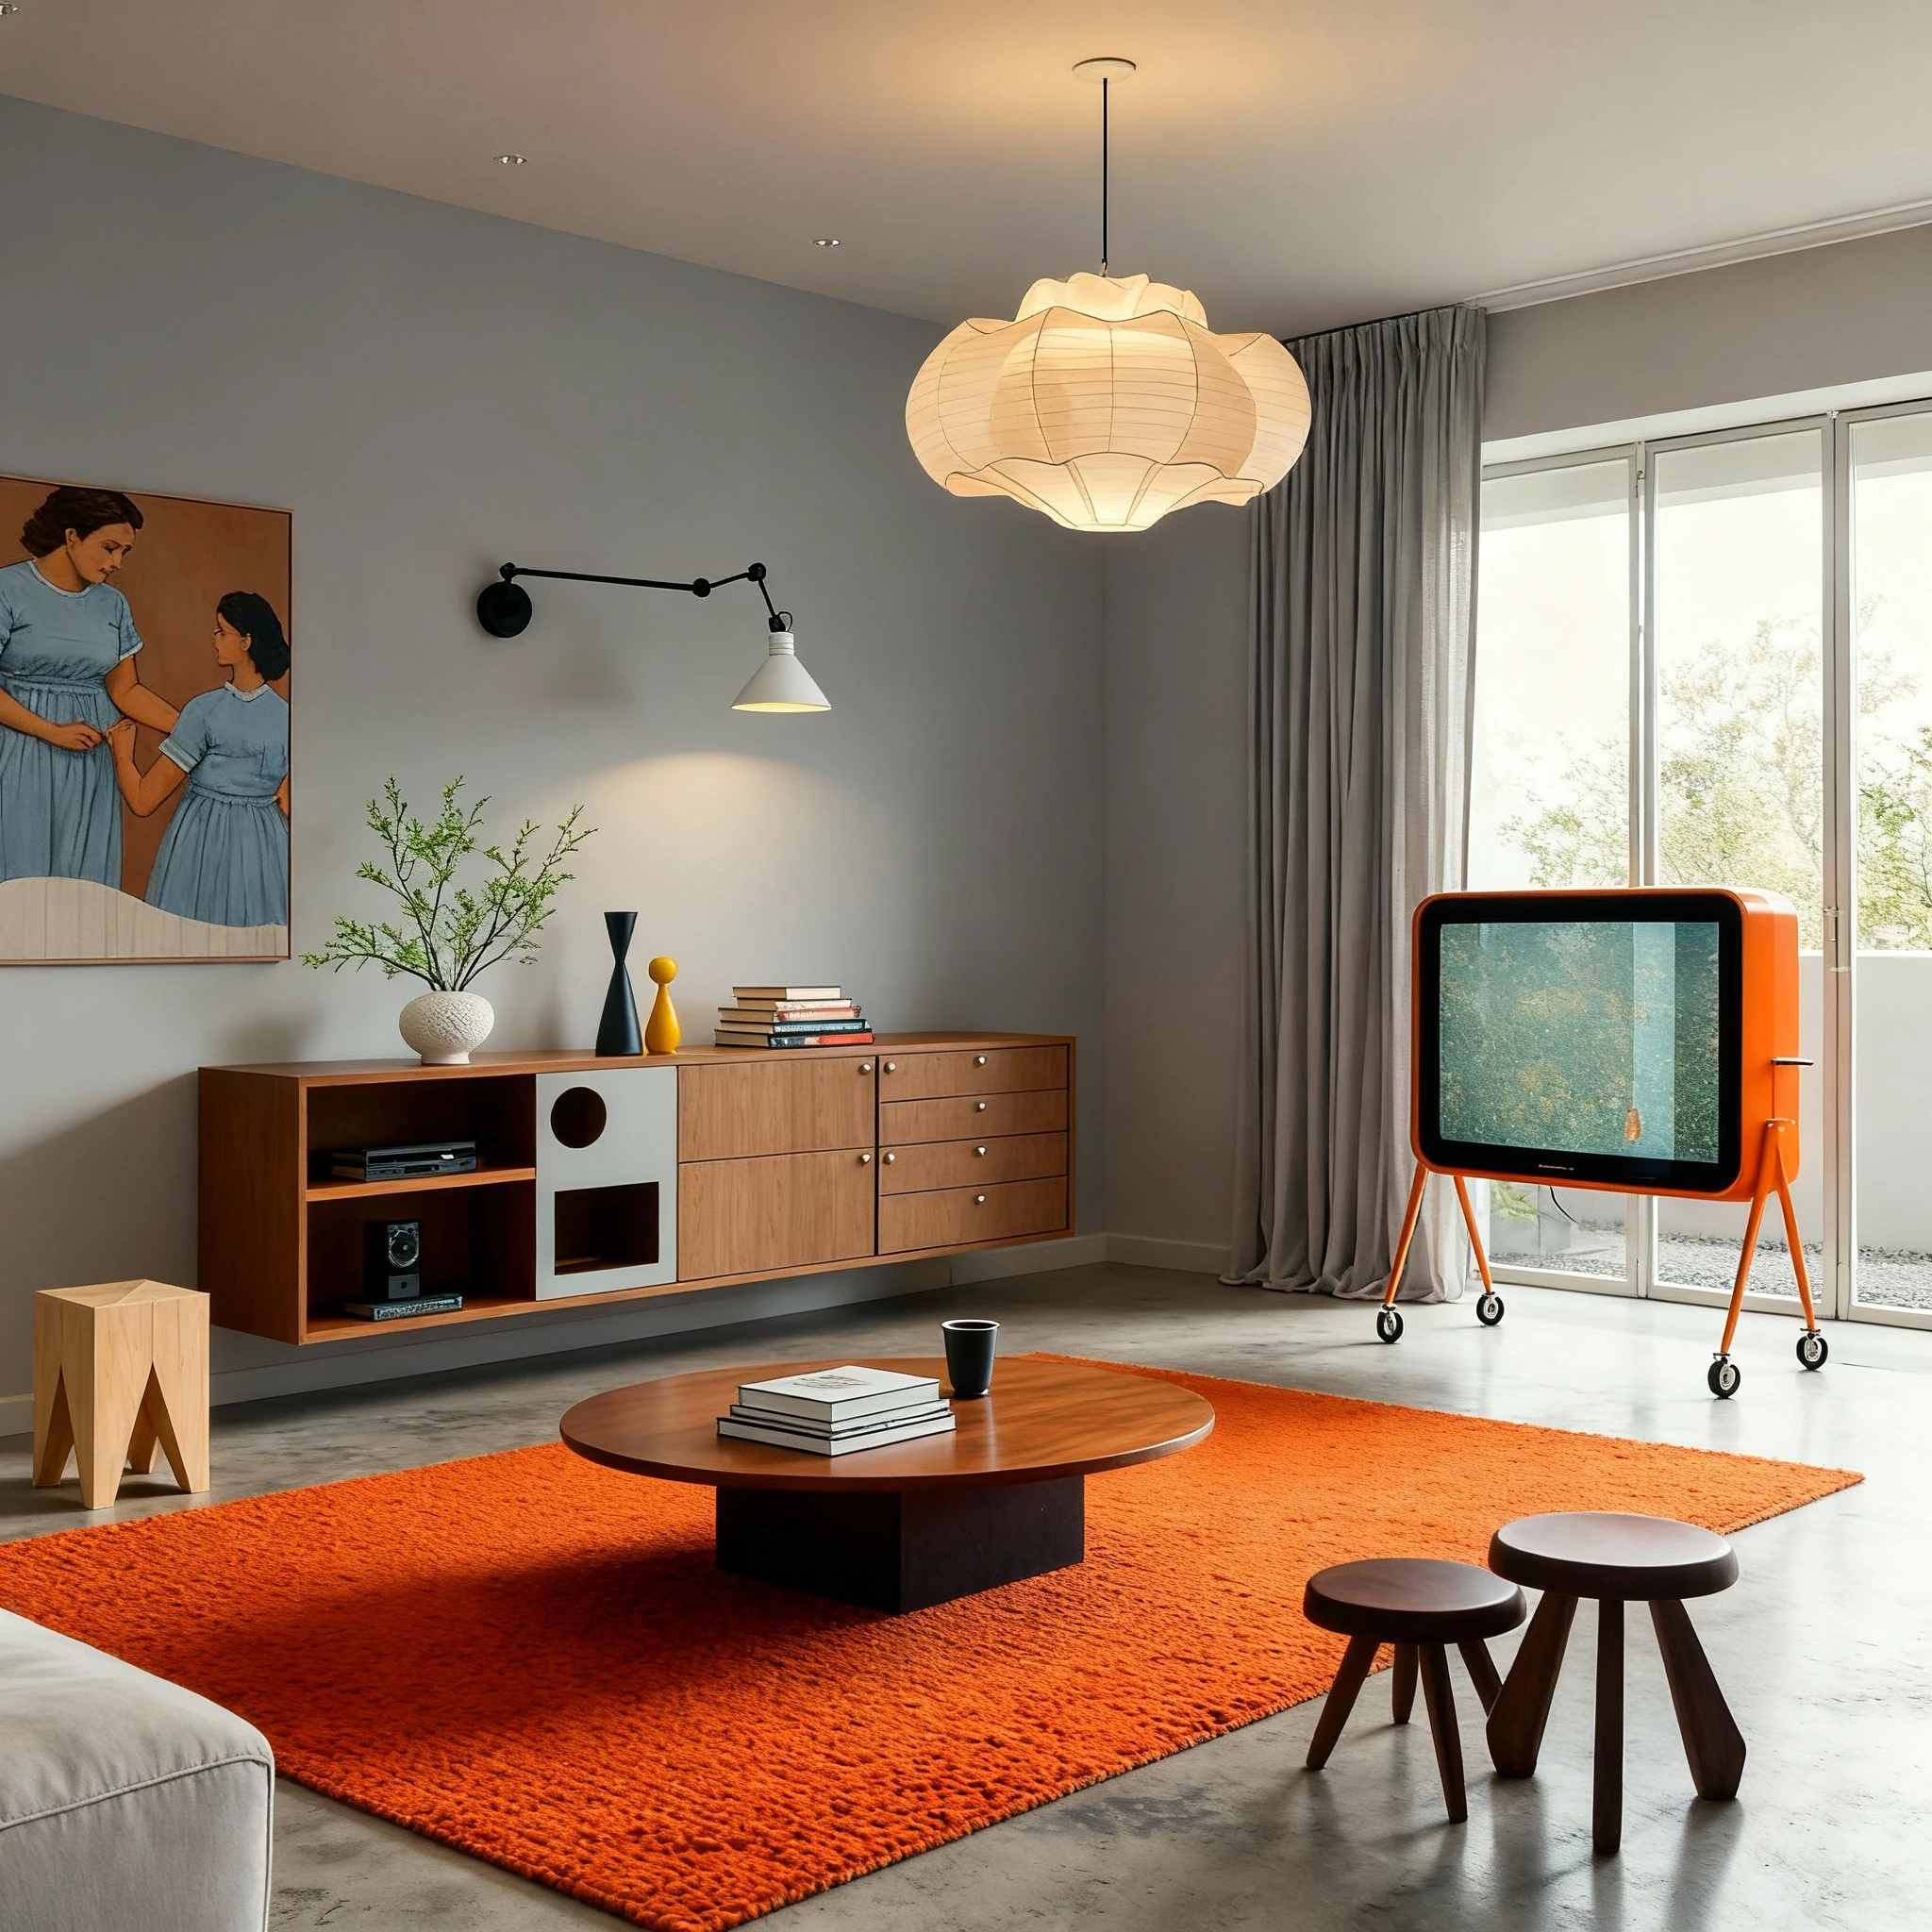
The furniture style is modern, sculptural, and comfort-driven, emphasizing clean geometry, soft edges, and grounded proportions. It combines mid-century warmth with contemporary minimalism, favoring tactile materials, muted yet confident colors, and a balance between visual solidity and playful form. Each piece feels intentional and expressive, blending utility with a sense of artistic design coherence.
Living room

Add furniture to my image, the furniture style is modern, sculptural, and comfort-driven, emphasizing clean geometry, soft edges, and grounded proportions. It combines mid-century warmth with contemporary minimalism, favoring tactile materials, muted yet confident colors, and a balance between visual solidity and playful form. Each piece feels intentional and expressive, blending utility with a sense of artistic design coherence.
Bedroom
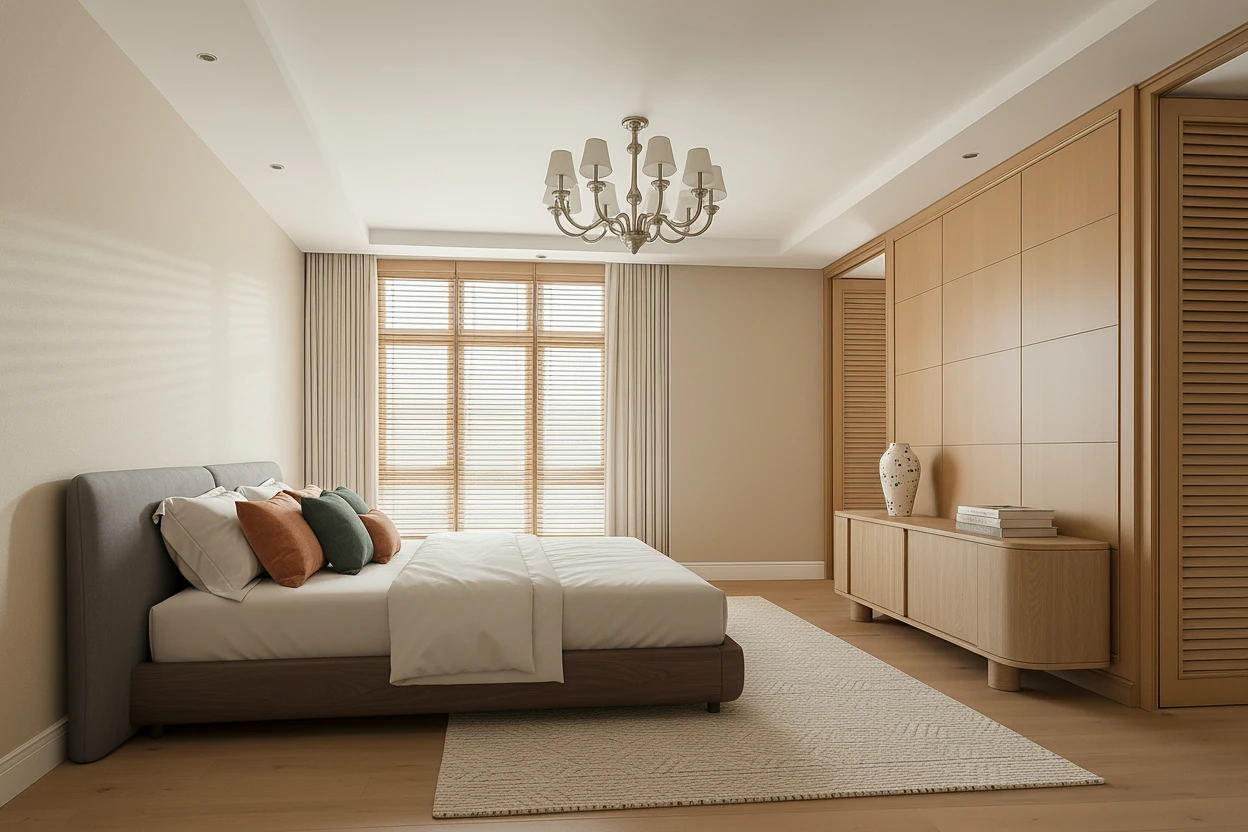
Add furniture to my bedroom, with a king bed against the wall on the left and and a low cabinet sitting against the wall on the right facing the bed, the furniture style is modern, sculptural, and comfort-driven, emphasizing clean geometry, soft edges, and grounded proportions. It combines mid-century warmth with contemporary minimalism, favoring tactile materials, muted yet confident colors, and a balance between visual solidity and playful form. Each piece feels intentional and expressive, blending utility with a sense of artistic design coherence.
Kitchen
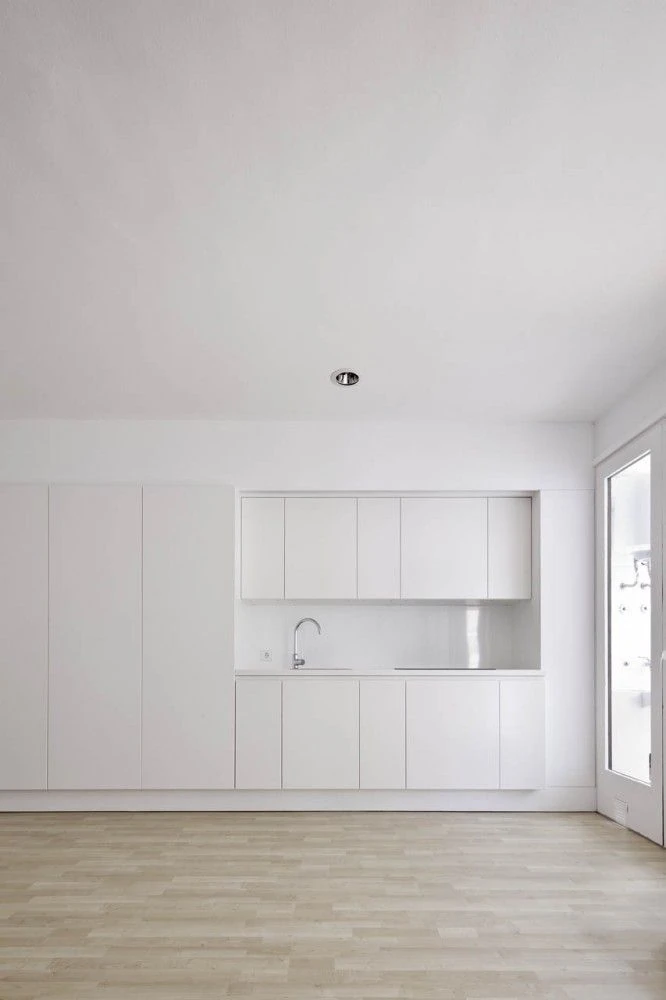
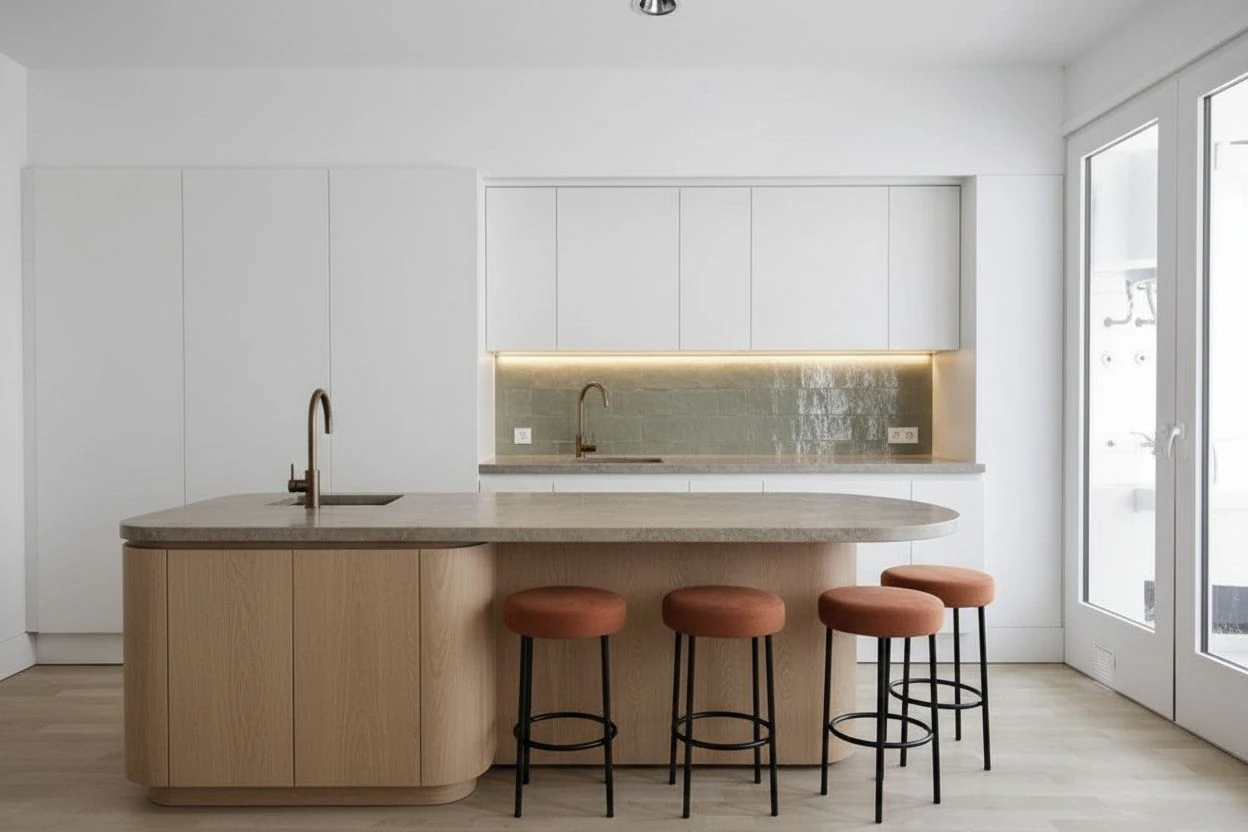
Let's furnish my kitchen, with a kitchen island in the middle of the space, with the style being modern, sculptural, and comfort-driven, emphasizing clean geometry, soft edges, and grounded proportions. It combines mid-century warmth with contemporary minimalism, favoring tactile materials, muted yet confident colors, and a balance between visual solidity and playful form. Each piece feels intentional and expressive, blending utility with a sense of artistic design coherence.
If you compare these results, you will notice that these three are not showing generic look with simple Ikea furniture, and the style you specified are actually dynamically reflected in all the rooms across.
If you are working with premium clients, another way to do this is to have any AI propose a full set of furnishing plan for all the rooms, and you can apply them to each room accordingly. This way, you are not just getting the same style across every room, but a cohesive design across the property.
2. Use Reference Images Effectively
Instead of just saying “premium” in your style prompt, find a few nice furniture pictures on Pinterest. Nano Banana accepts up to 10 reference images (though 2-3 max is recommended for the best results). You can include multiple furniture pictures to guide the AI in creating the staged result. This way, actual furniture you pick adds personal touches to the photos instead of generic furniture that might not resonate with buyers.
Redesign the interior decoration and furniture choices for image 1 by using items and styles from image 2. But keep the room structure(walls/windows), only redecorate it with color, material, style and furnitures, and use the same camera view from image 1 to recreate the photo.
3. Balance Interior and Exterior Lighting
Many listings show balanced lighting so both interior and exterior are naturally displayed. If your room has windows showing the exterior, it’s better to use an underexposed photo because it preserves detail better than an overexposed one. With the right prompt and GPT4o, you can adjust it to achieve the desired HDR effect. You can also use Nano Banana if the overall room lighting is already great and you just want to enhance the scenery.
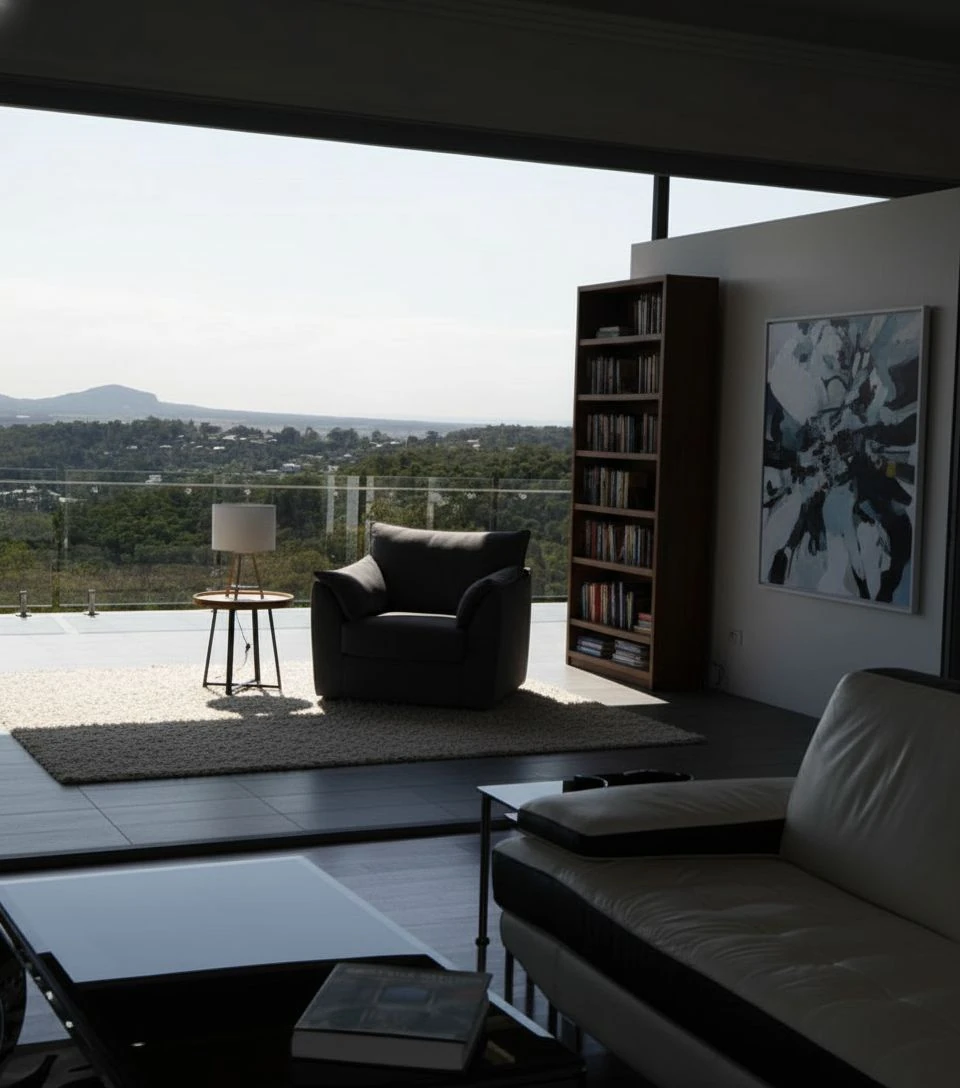
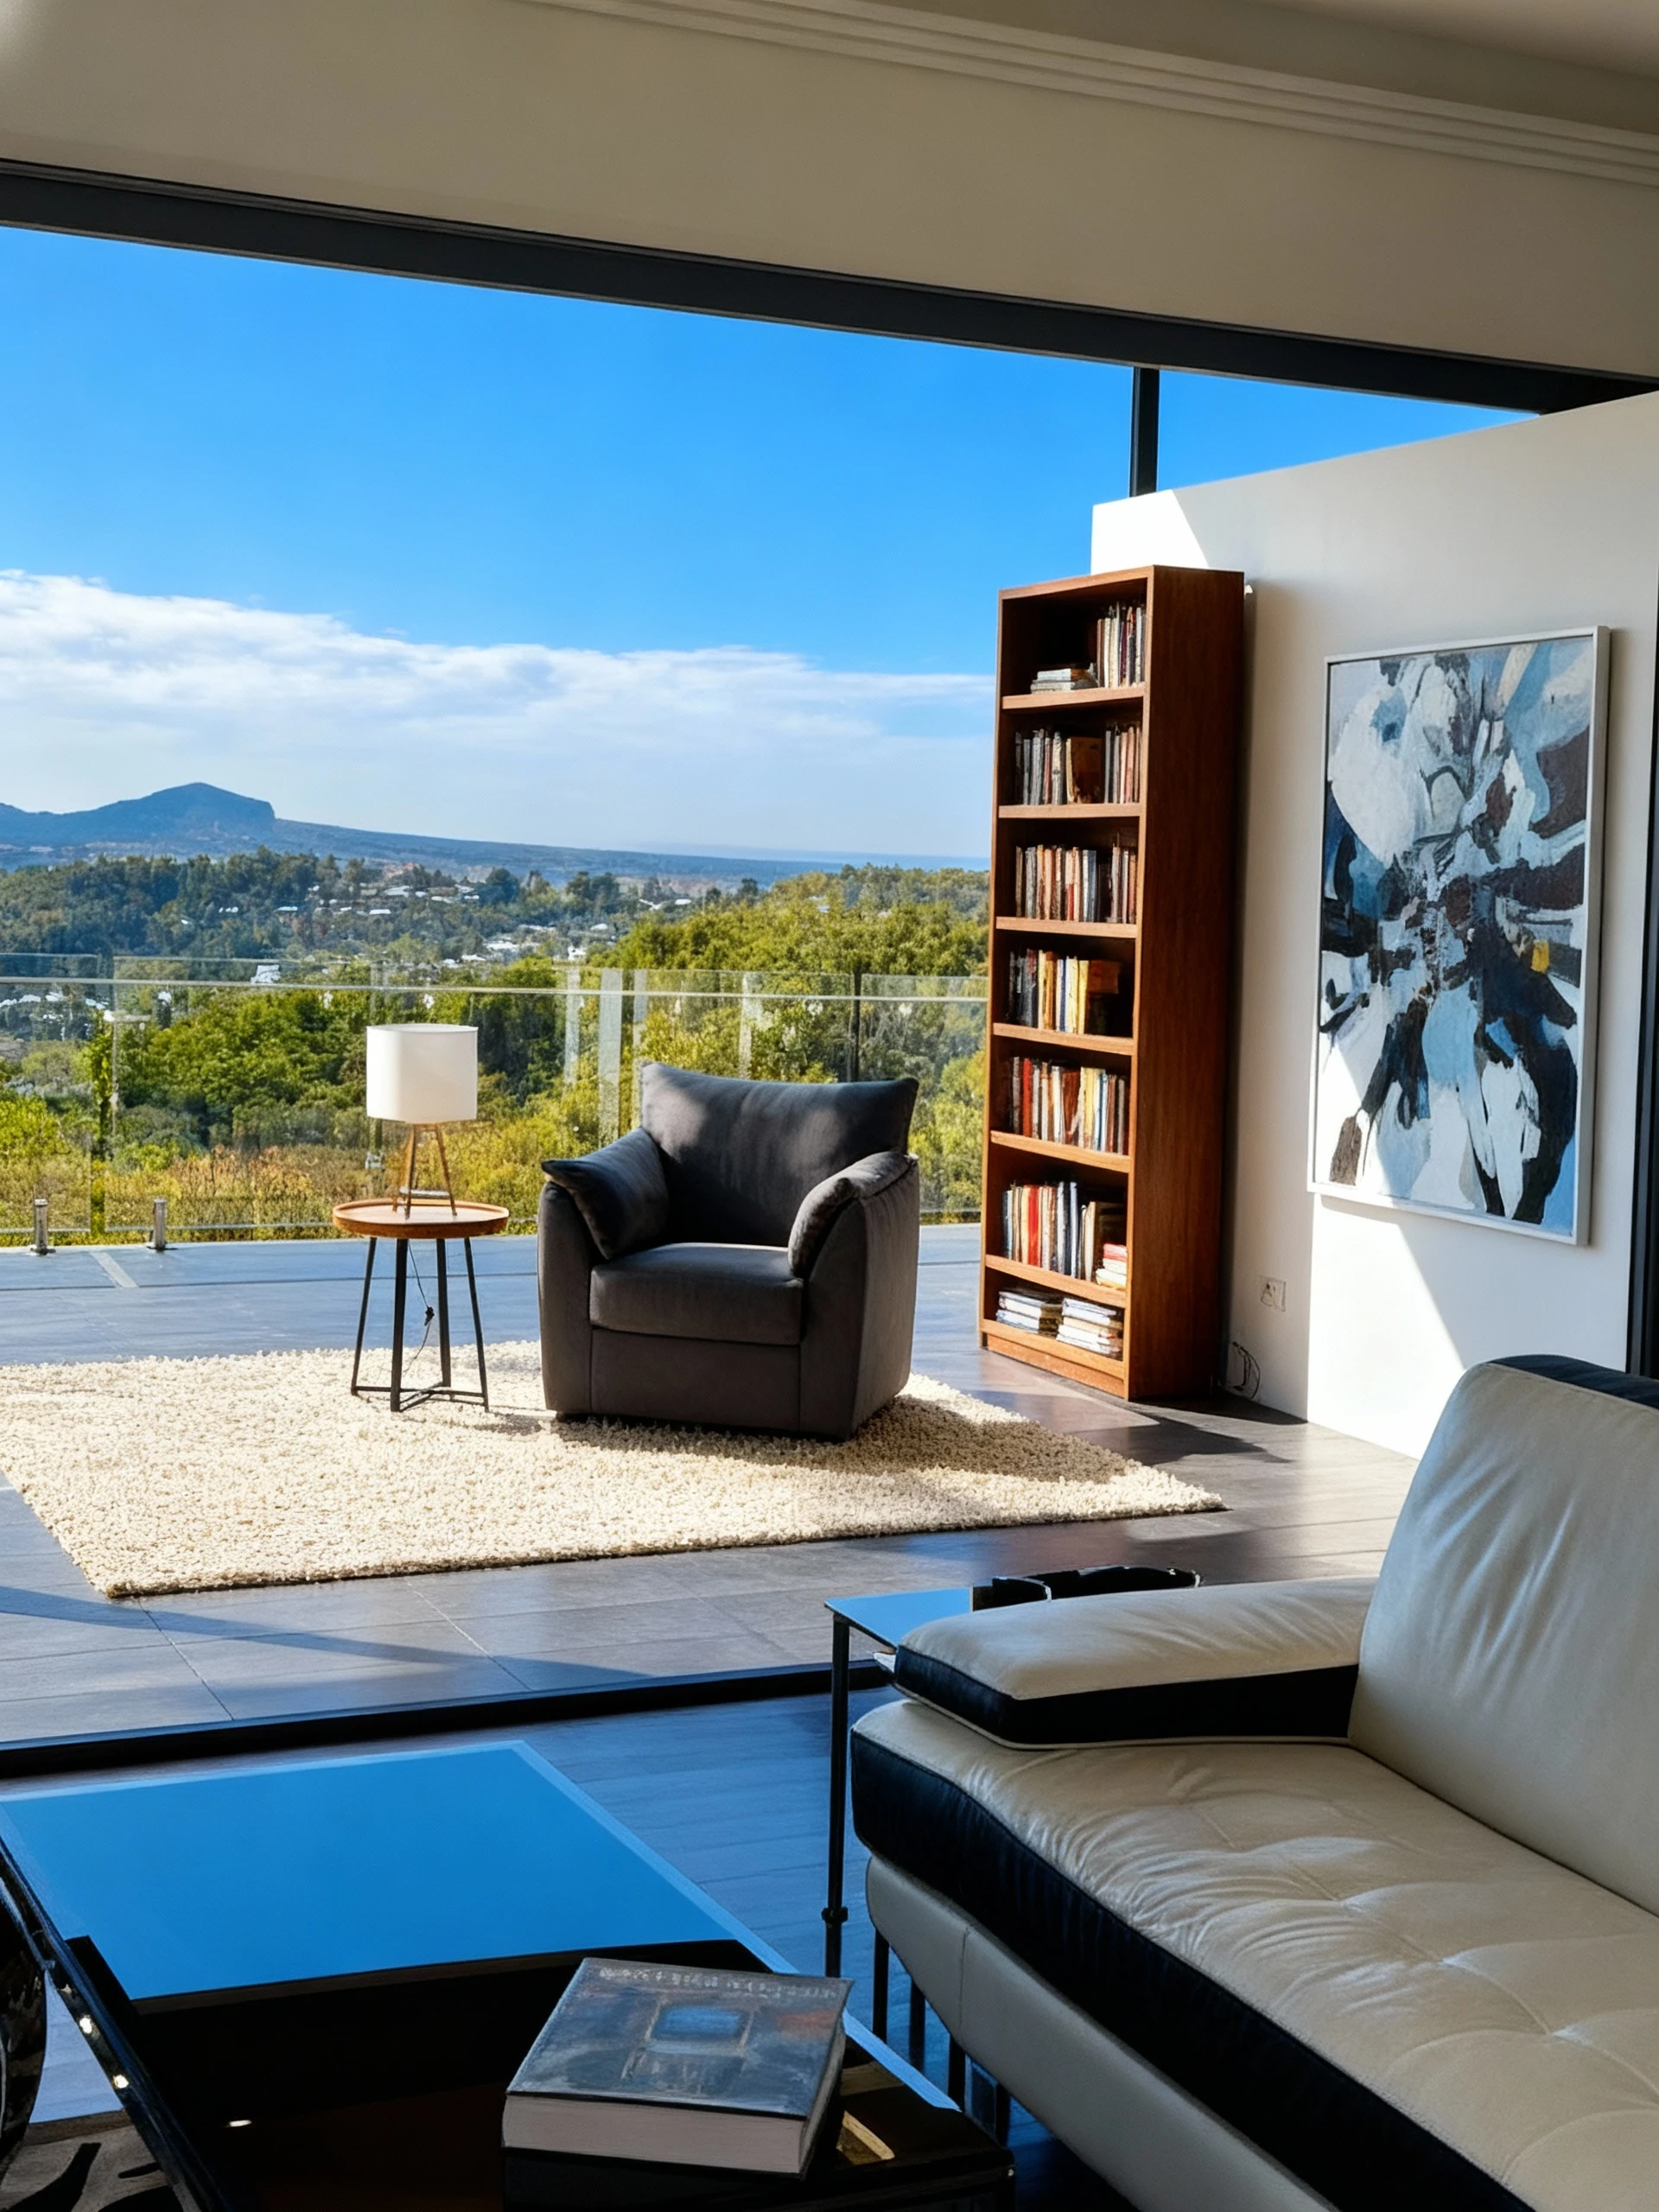
Enhance this interior photo using an HDR-style edit to balance indoor and outdoor exposure. Brighten the interior to reveal furniture details while preserving the view outside the windows with natural dynamic range, make the interior much brighter, almost too bright. Adjust contrast and highlights to create a crisp yet realistic look. Improve color balance and sharpness for a clean, professional finish. Subtly boost warmth and daylight tones to make the space feel inviting and well-lit, with clear textures, accurate whites, and smooth tonal transitions between light and shadow. lower the brightness of the sky, so we can see blue sky.
Summary
With a bit of preparation and the right approach, AI virtual staging in Banana Designer is accessible to everyone—no professional photos required. Clean up your images, use Nano Banana for precise edits and GPT4o for lighting and enhancement, and break complex tasks into simple steps for the best results. Remember to be specific with your prompts, maintain consistency across rooms, and use reference images for a personal touch. Most importantly, don’t be afraid to experiment—Banana Designer makes it easy and affordable to try different styles and setups until you find what works best for your property.
