AI Fashion Campaign: Full Seasonal Collection Workflow ($1/Run)
Producing a seasonal lookbook for a sports apparel brand typically involves booking models, renting locations, and hiring photographers—easily costing thousands of dollars per day.
In this guide, I will share a production-ready Grid Canvas workflow that allows you to generate a full 10-image campaign for a men's sports jacket and pant set. The best part? Once set up, running a new set of clothes through this entire pipeline costs only around $1-2.
The Professional Standard: Consistency & Scalability
As digital designers, we know that one-off generations aren't enough for a brand. To build trust (and sales), you need:
- Consistent Fit: The garment must look the same in every shot.
- Consistent Model: The same brand ambassador across the entire season.
- Scalable Environments: The ability to change the background from an "Urban Gym" to "Swiss Alps" without reshooting.
This workflow is designed specifically for these high-volume, high-consistency needs.
The Workflow: 4 Steps to a Full Campaign
We will build a pipeline that takes raw garment designs and outputs a cohesive editorial spread.
Step 1: Asset Preparation
First, we need our raw materials. You don't need a physical sample; a digital design or flat lay works perfectly.
The Assets:
- Garment Design: Upload your sports jacket and pants. This can be a flat lay photo, a 3D render, or a high-fidelity sketch.
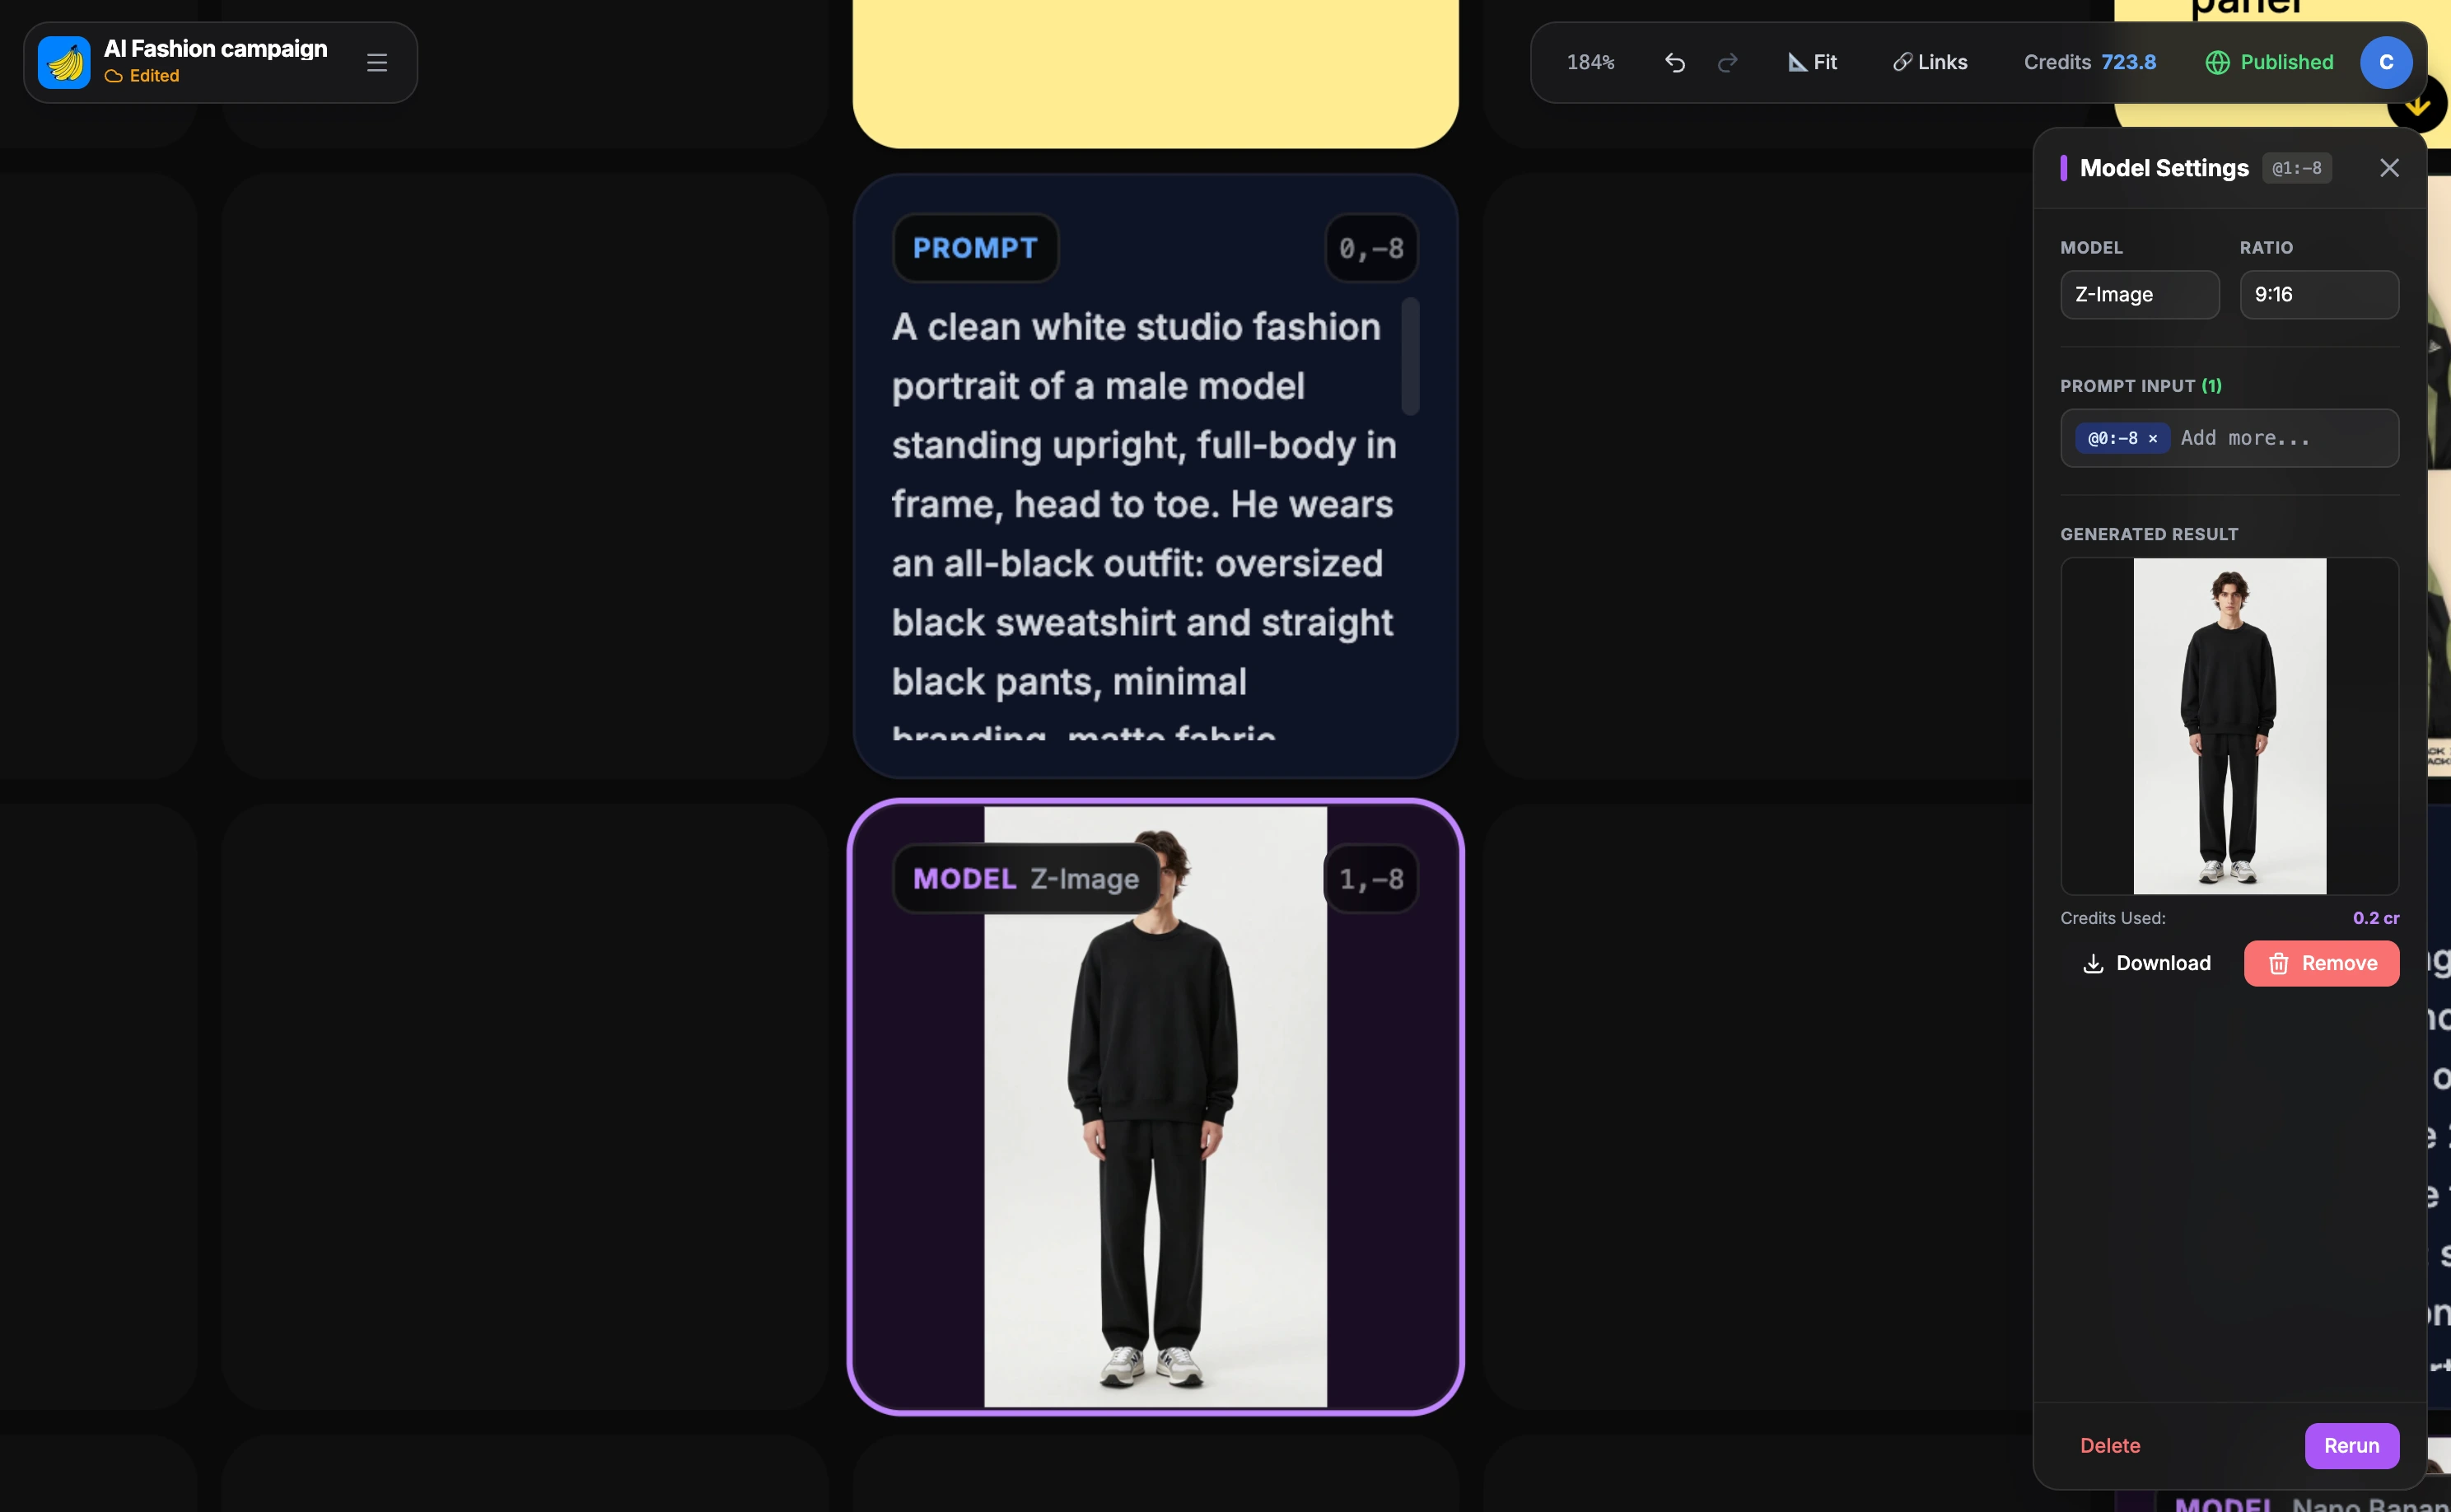
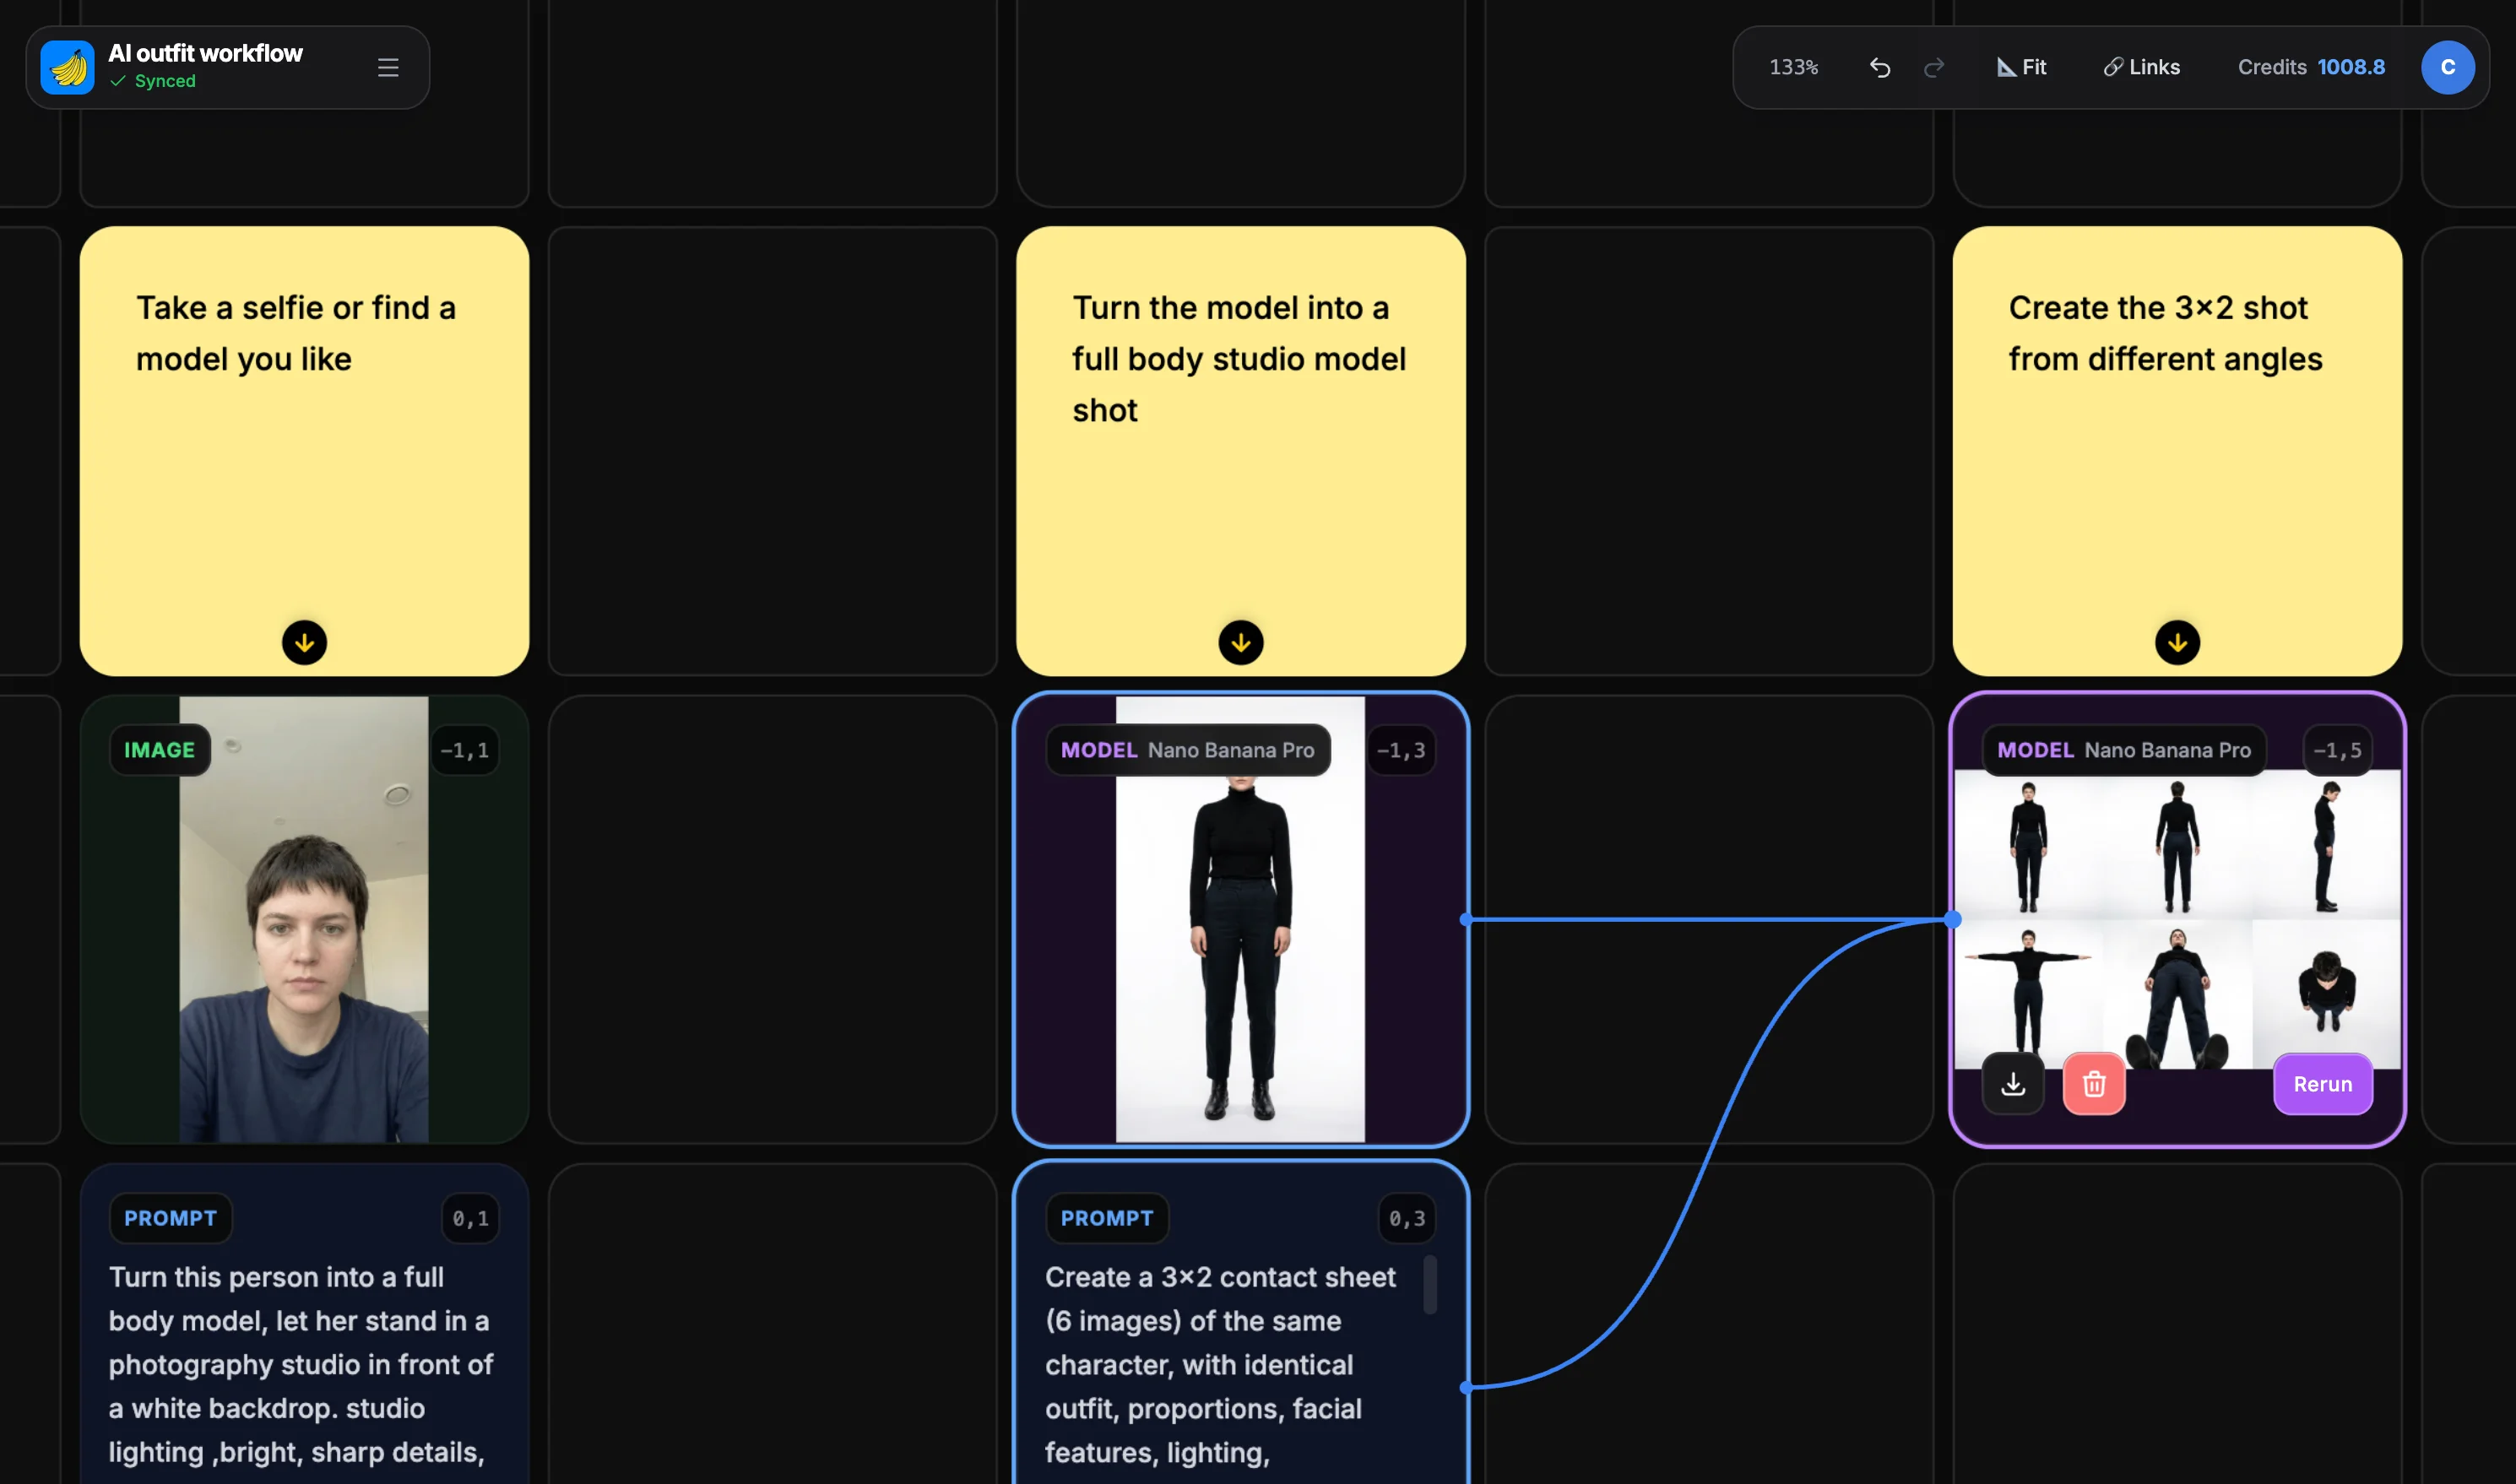
- The Model: Create or upload your brand model. We use a "Model Cell" to generate a consistent male model on a white background to serve as our mannequin.
Why this matters: By isolating the model generation first, we ensure his features (height, build, hair) remain locked for the rest of the campaign.
Step 2: The Virtual Try-On (Front & Back)
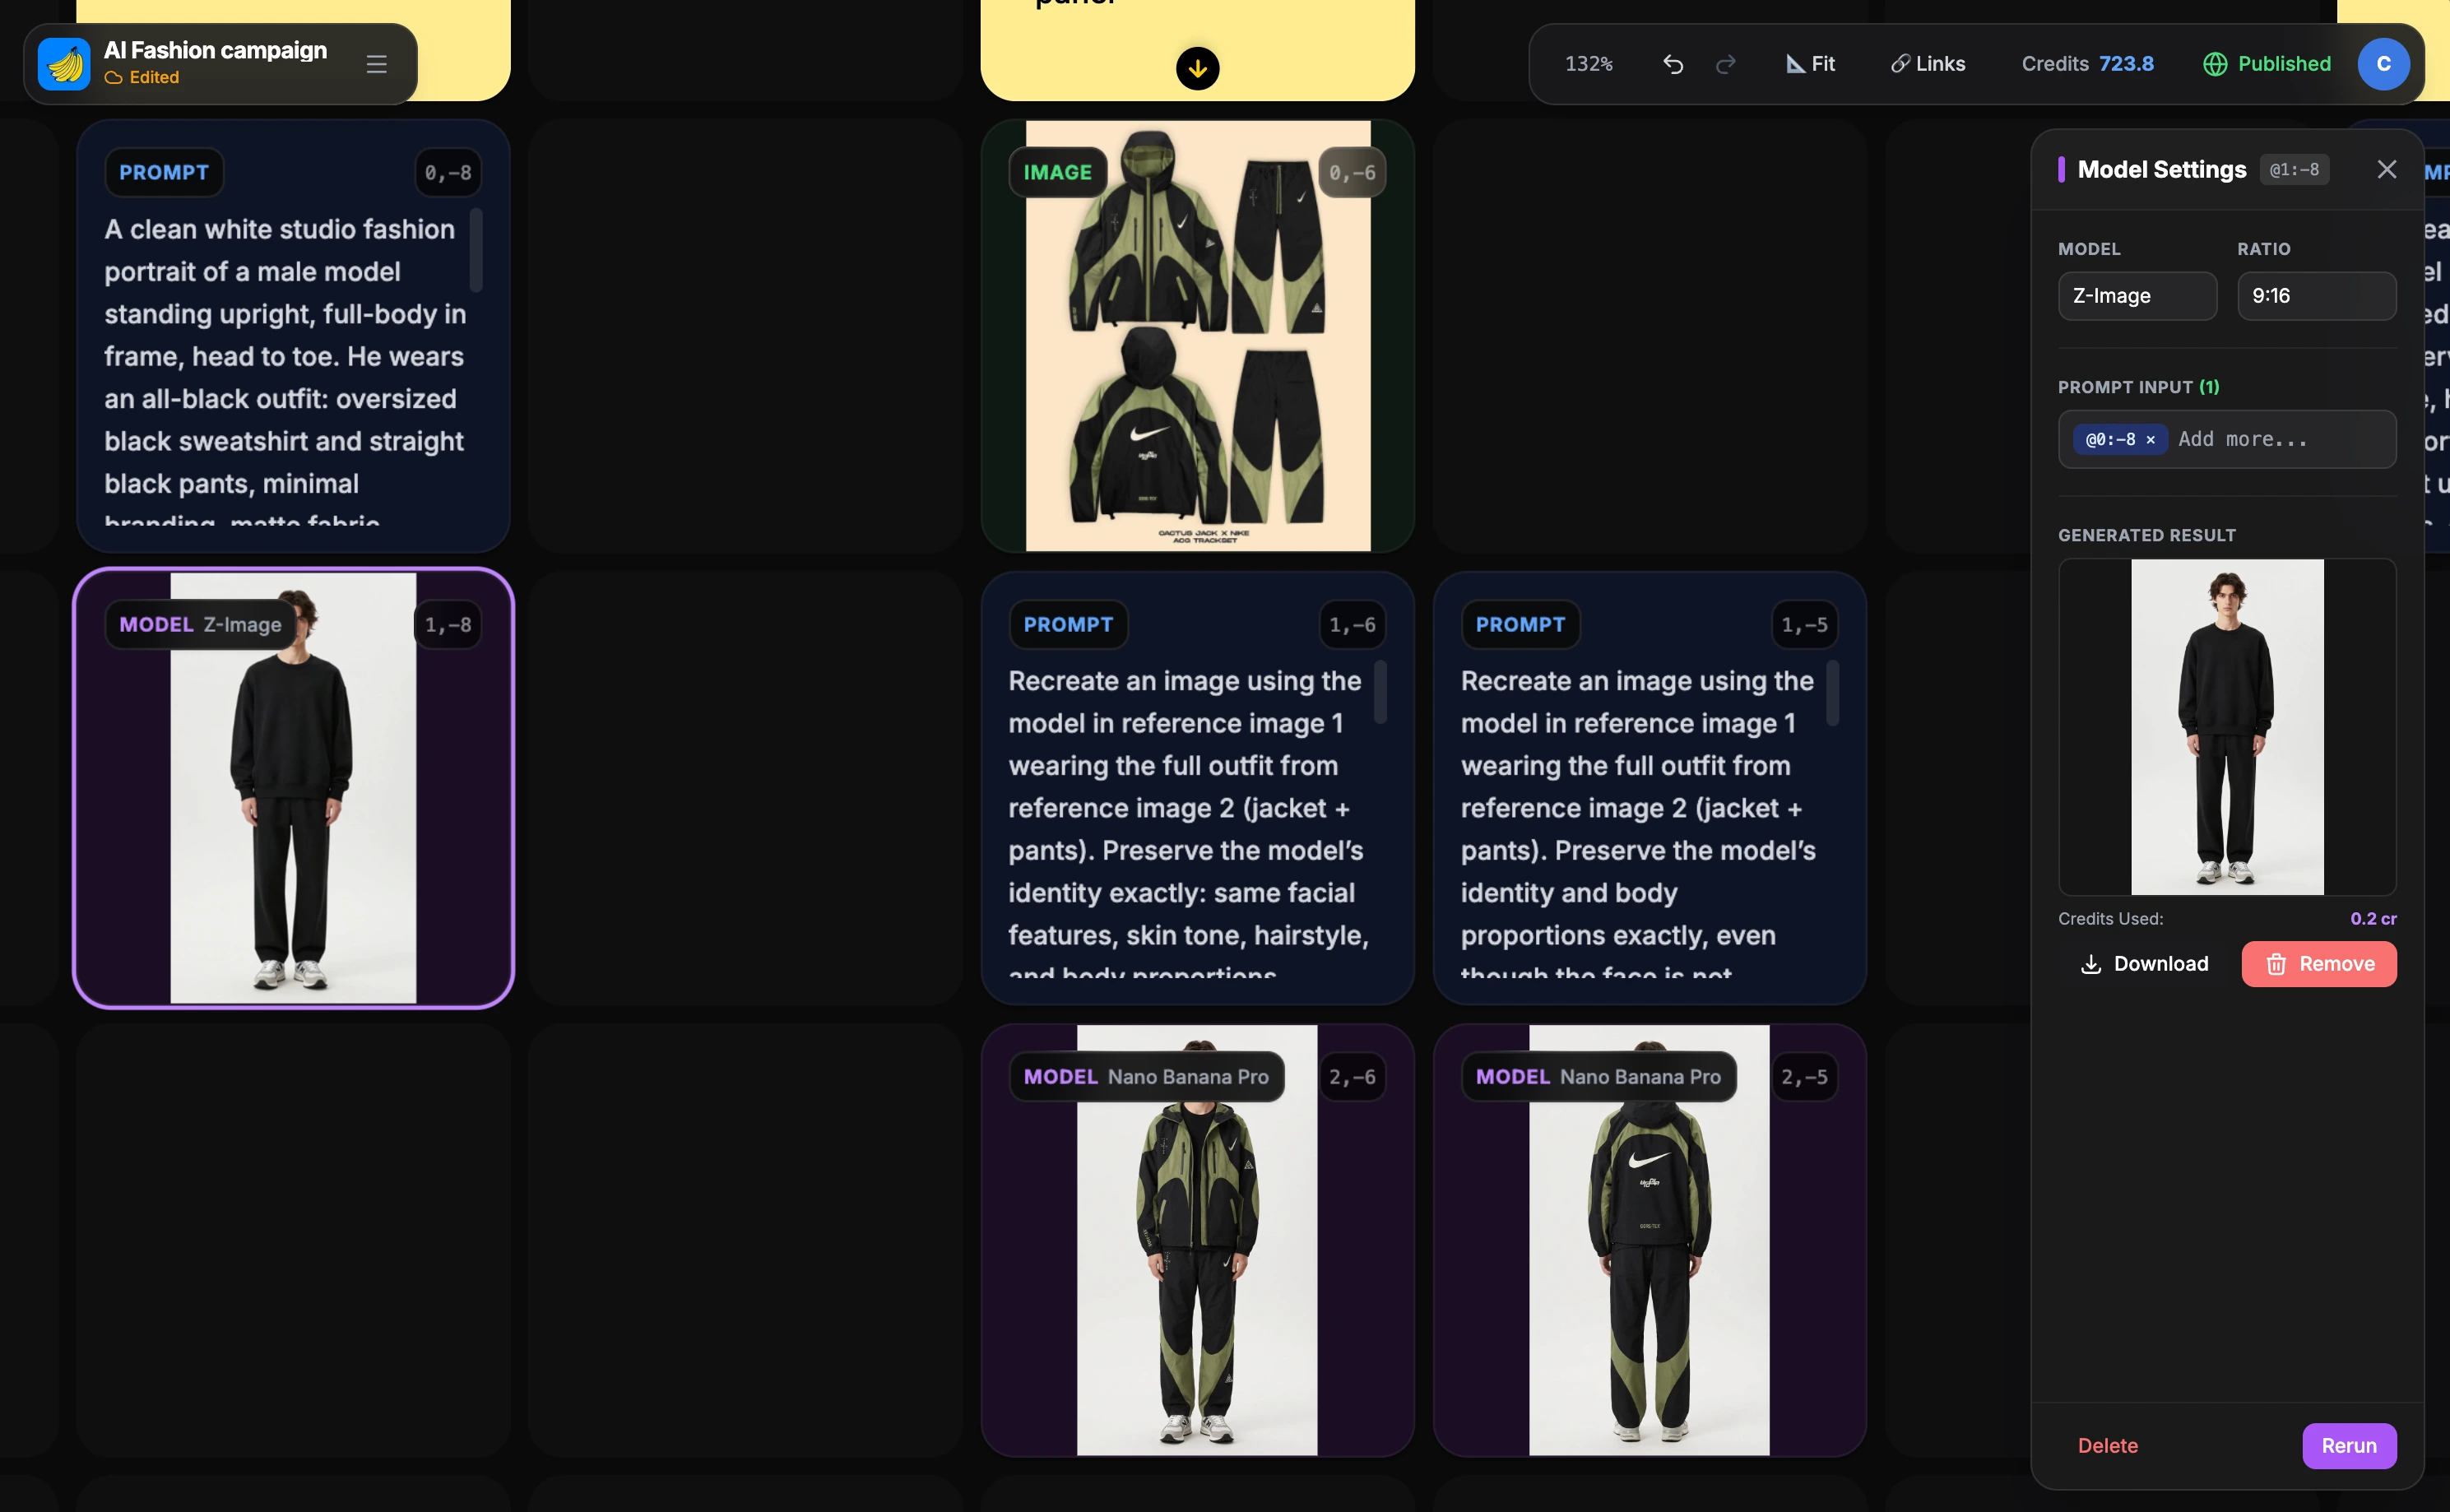
Before we get artistic, we need to establish the fit.
Goal: Create reference images of the model actually wearing your specific garments.
The Technique: Connect your Garment Images and Model Cell from step 1 into two new generation cells:
- Front View: "Full body shot, front view, wearing [garment description]..."
- Back View: "Full body shot, back view, wearing [garment description]..."
This step "bakes" the clothing onto the model, creating the master references for all subsequent lifestyle shots.
Step 3: The Campaign Generator (10 Shots)
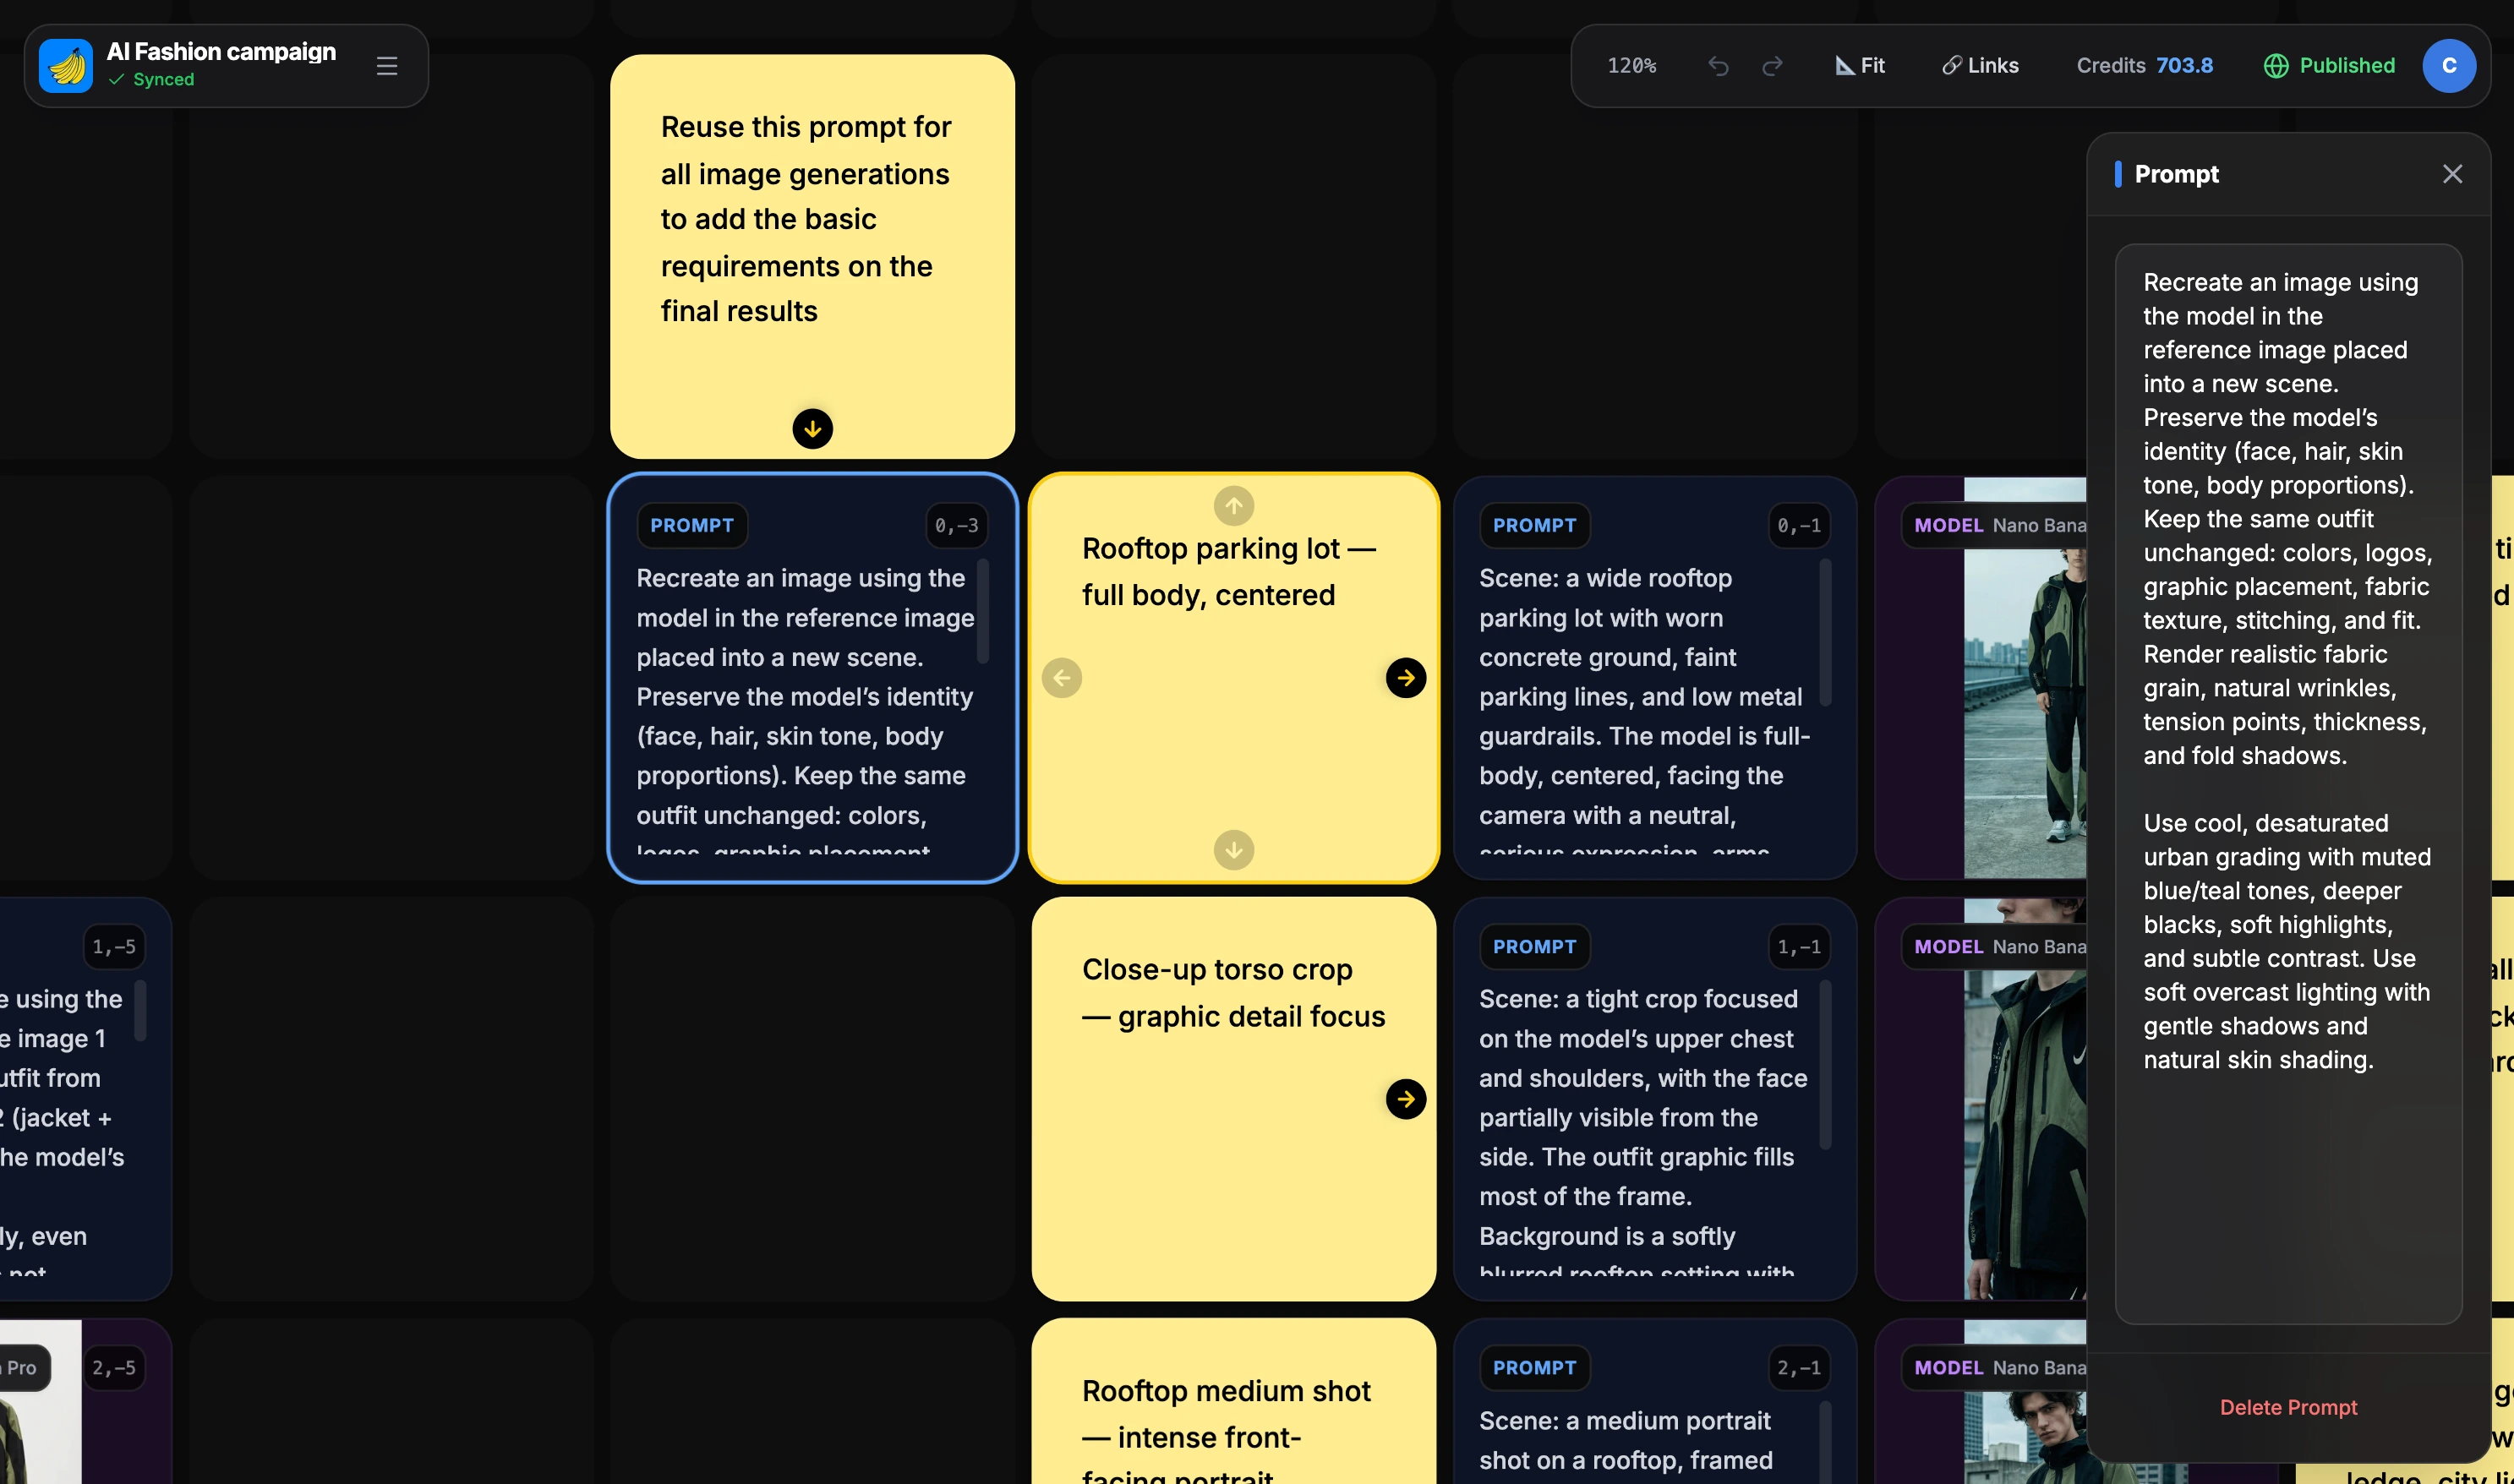
Now for the magic. We take our "fitted" model references and multiply them into a full lookbook.
Goal: 10 diverse editorial shots with controlled environments.
The Setup: We create a Master Environment Cell—a prompt cell that defines the location (e.g., "Modern concrete stadium tunnel, dramatic artificial lighting").
We then link our Fitted Model References (from Step 2) to 10 parallel Model Cells, each with a unique angle/focus prompt:
- Shot 1: Low angle, heroic stance
- Shot 2: Close-up on zipper detail
- Shot 3: Action shot, running
- Shot 4: Seated on bench, resting
- ...and so on.
The Control: Because the environment is defined in one central cell, you can change the entire campaign's mood by editing just that one text block.
Step 4: Seasonal Scalability
The true power of this workflow isn't just the first run—it's the second, third, and fourth.
The Scenario: Summer is over. It's time for the Winter Collection.
The Process:
- Swap the garment images in Step 1 (e.g., to a Winter Parka).
- Update the Environment Cell in Step 3 (e.g., to "Snowy mountain peak").
- Click Run x10.
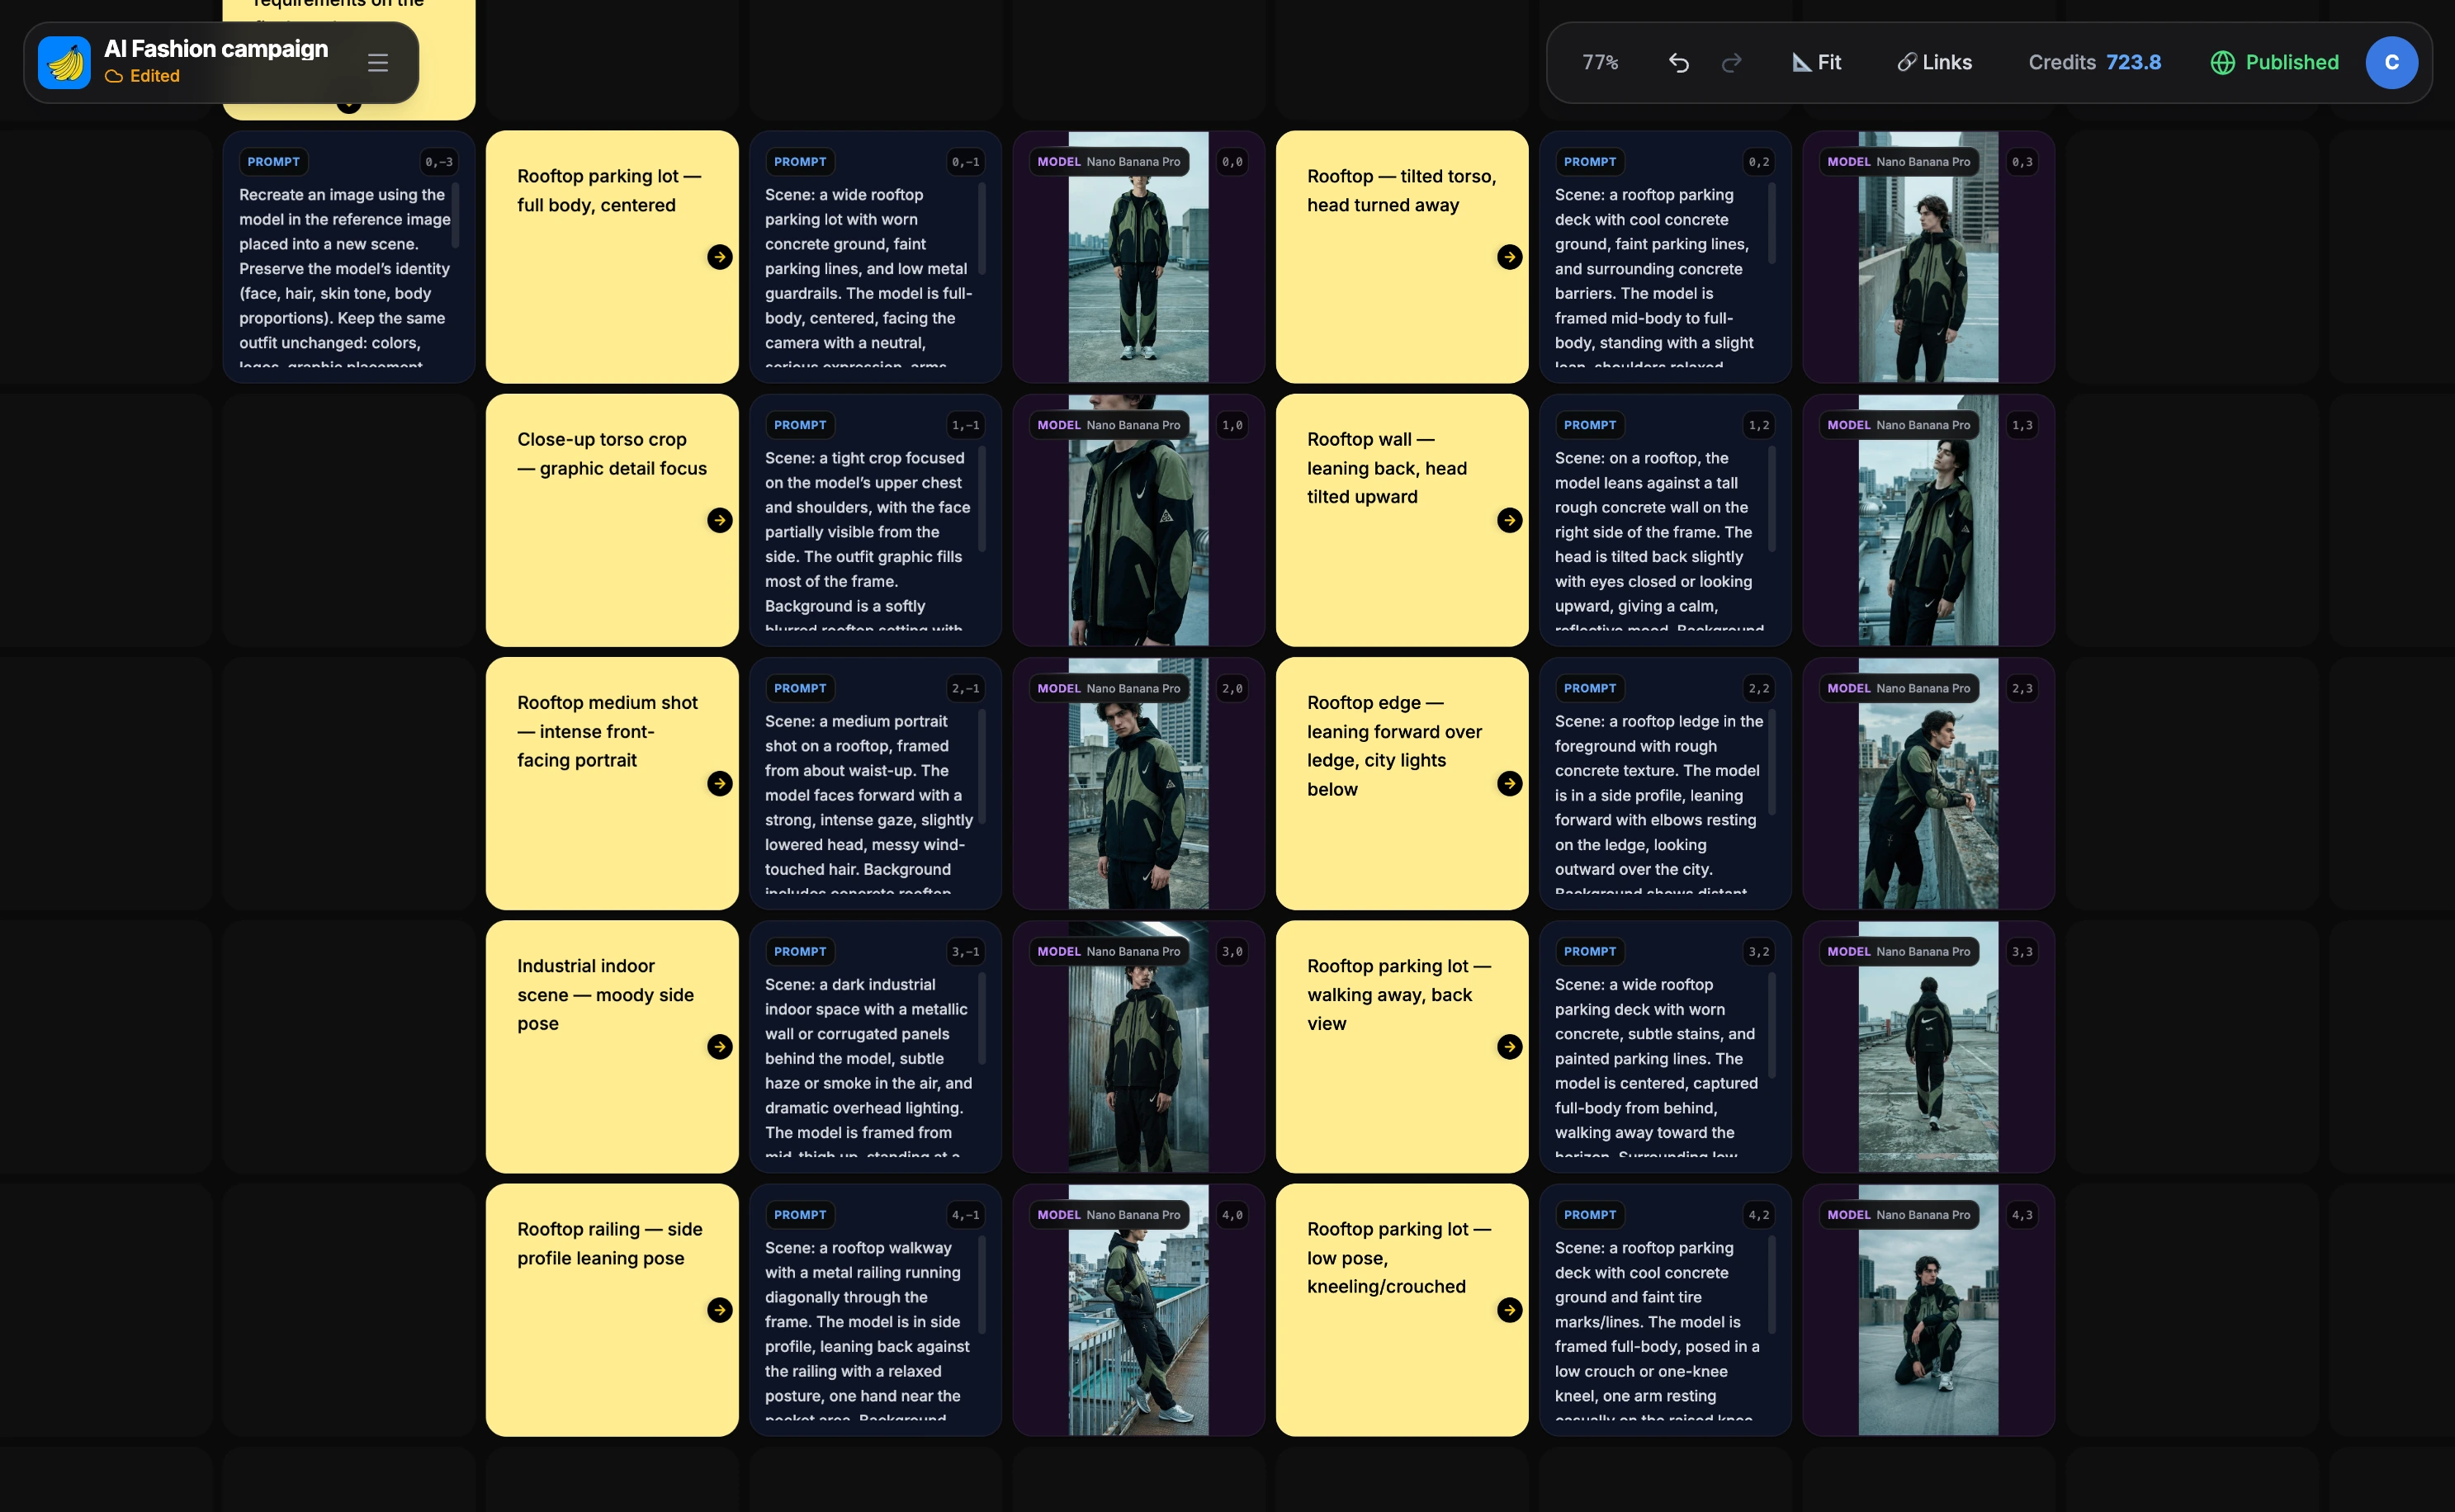
The entire 10-shot campaign regenerates with the new clothes and new location, keeping the same model and camera angles. Total cost? About $1.
Why Grid Canvas for Brand Campaigns?
- Cost Efficiency: A traditional shoot costs thousands. This costs dollars per SKU.
- Speed: Go from design concept to marketing assets in minutes, not weeks.
- Agility: Test 5 different locations before deciding on the final campaign look.
Get Started
Ready to launch your digital fashion house? Open Grid Canvas today and replicate this Sports Apparel Workflow to revolutionize your content production.
Grid Canvas Basics
If you are new to Grid Canvas, here is a quick primer on how the system works. Unlike a linear chat, the canvas uses a node-based workflow similar to professional design tools.
The Building Blocks: Cells
The canvas is built from Cells, which act as containers for different types of information:
- Prompt Cells: These store your text instructions (e.g., "Modern concrete stadium"). You can link one prompt cell to multiple model cells to enforce a consistent environment.
- Model Cells: These are the engines that generate images. They take inputs (prompts, reference images) and produce visual outputs.
- Image Cells: These hold your generated images or uploaded references. You can link an image cell into a model cell to use it as an image-to-image reference.
Connections & Flow
The power of Grid Canvas lies in Connections. You don't just type and wait; you build a pipeline.
- Link Prompts: Connect a single "Environment" cell to 10 different Model Cells. Change it once, and all 10 backgrounds update.
- Pass References: The "Fitted Model" output from Step 2 becomes the input for the Step 3 campaign shots.
- Batch Generation: Run all 10 campaign shots simultaneously to save time.
This spatial organization allows you to see your entire creative logic at a glance, making complex workflows like the Campaign Generator possible.
What's great about Banana Designer's grid canvas is that it supports post-it notes on the canvas, and you can write down notes next to your workflow and use the canvas like a notebook to help you track your progress or configurations.
Related Resources
Expand your AI fashion capabilities with these guides:
- AI Flat Lay Photography – Turn a single photo into 10 product variations.
- AI Fashion Workflow – Master consistent character generation for on-model shots.
- Prompt Composer – Master the art of writing descriptive prompts for consistent results.
